Welcome to Running With Rifles!
Running with Rifles is a top down/isometric shooter where you take on the role of a single soldier in the middle of a massive all out war between the Greenbelts, the Graycollars and the Brownpants. You are insignificant. You are no better than the man next to you. You are no god of war with regenerating health. You are just a soldier.
This handy handbook is the key to victory and success on the battlefield. While at a first glance RWR seems like an easy game to play and understand, there is actually quite a lot of depth and complexity to the gameplay that can easily frustrate or confuse new players. However, after reading this handbook, you should have a much better understanding of RWR.
This guide should help with any questions and issues you have and improves your chance of survival from 0% to at least 5%.
Getting started[ | ]
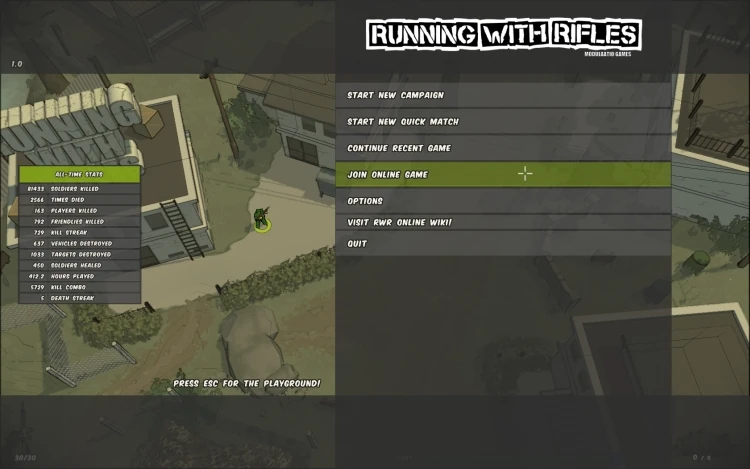
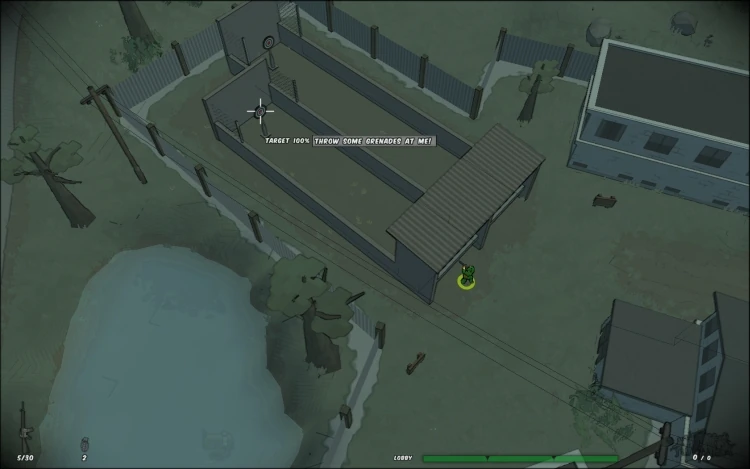
When you start up the game, you will find yourself in the lobby/playground area, which is basically a small map without any enemies. You can toggle the menu on and off with the ESC key. Doing so will allow you to use The Playground, which contains some basic tips and allows you to familiarize yourself with the way the game works. To start/resume a quick game/campaign, you need to have the menu opened (ESC).
The lobby has a stash and an armory that you can interact with. There is also a jeep that you can drive. On the top of the main building there are 2 crates. You may want to climb the ladder and smash the crates with your knife (default key "V") and pick up the items inside. Note that you are only a private (see Ranks) so that you might not be able to pick everything up (default key "F") directly as they are rank restricted. So when you are near those grayed out objects, hold the F-key to open your inventory and drag and drop this stuff into the backpack section of the inventory.
The Playground allows you to do some basic tasks that will allow you to gather some xp, which in turn will let you use more of the equipment found in the aforementioned crates and in the armory. You can also read some tips scattered around this area.
You can then go to the armory and sell your stuff. You may also want to go to the stash and pick up a valuable and sell it to the armory in the event that you need more resource points to buy equipment.
When you leave a campaign or a quick match, you will automatically come back to the lobby with the Playground loaded.
Singleplayer[ | ]
Campaign[ | ]
The campaign in RWR is a series of Invasion type maps where you conquer the continent one map at a time. Each map has you starting with only one base and having to advance through either Graycollars or Brownpants resistance, or sometimes even both at the same time.
After defeating a map, you can choose the path to go and so choose your next map from any adjacent map that is logically connected with a dashed line in the worldview (see Mapview). During the campaign, all XP, RP, and equipment are tracked throughout. You can also turn a singleplayer campaign into a campaign online through local hosting at any time by activating a server by pressing ESC>Activate server. Note: Remember to forward the port that is shown when activating your server !
Quick Match[ | ]
To jump right into a simple single player game, just select “Start new quick match” from the main menu. Unlike the campaign, you can adjust your settings freely, such as maximum numbers of bots, your starting rank, etc. The other point that differs it from the campaign is that once played online, players can join either team they want, which makes it suited for PvP sessions.
Multiplayer Joining[ | ]
To join an ongoing multiplayer game, simply head to the main menu and hit “Join online game”. You will then be presented with 2 options: “Public server list” or “Manual IP”.
Public Server List[ | ]
The public server list is a server browser that shows the open servers that are online. Simply double click a server, select a username, faction, enter a password and initial rank, and hit “Start!”. If you can't join a server, it might either run an obsolete version of the game or the host didn't forward the UDP port required (default port: 1234)
Manual IP[ | ]
To connect via a direct connection using an IP address, select “Manual IP”, enter the address and port of the host server, select a username and password, a faction, initial rank, and hit “Start!”.
The server list is mainly for open games that anyone can join. Therefore, if you wish to play with a few select friends only, when hosting, choose not to advertize the server on the server browser and connect via manual IP.
Multiplayer Hosting[ | ]
Hosting a multiplayer is as easy as setting up your own quickmatch game or campaign as shown previously, hitting “ESC” to get to the main menu, and then hitting the “Activate server” button.
|
Once you hit “Start!” the server will be open for connections. If people are having issues connecting with your server, please check to make sure that the port is properly forwarded. We will not go into details about how to do this. To get instructions on port forwarding, please do a Google search or check the manual of your router.
Movement and Shooting[ | ]
Congratulations! You are now smack dab in the middle of a fight. Now what? The first thing you should learn is how to navigate the open terrain and shoot those damn *insert other color here* soldiers. Please note that all of these key bindings are default. You can change them to your liking in the “Options” menu.
Movement Key Bindings[ | ]
The keys shown are the default controls, which can be re-bound. See the controls page for more.

|
Basic Movement Keys |
  
| |

|
Crouch |
| Crouch Toggle *For prone and toggle prone, they are by default bound to ALT and Z, respectively. | |

|
Vault Wall / Climb Ladder / Respawn / Enter and Exit Vehicle |

|
Walk |
Shooting[ | ]

|
Shoot |
| Throw Grenade Towards Cursor * The further your cursor is from your character, the further the grenade will go | |
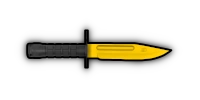
| Knife | |
| Strike Call Radio (Hold) * A small red circle will denote the place where strike will fall on. | |
| Pick up Weapon or Equipment | |
| Switch Between Primary weapon slot and Secondary (Weapon/support) slot (e.g. between M16A4 and M72-LAW) *NOTE: Q is the default key now* |
Inventory, Armory and Stash[ | ]
UI[ | ]
The UI in RWR is kept relatively simple, so that the player's screen isn't occluded with UI elements.


Primary weapon slot
Secondary weapon/Support item slot
Throwable item slot
Wearable item slot
Radio device - grayed out until you reach Corporal rank. The green dots below show which calls are available
Name of the base you are actually in
Capturing sector force bar (see Capturing Sectors)
Squad icon - the first number shows the number of soldiers in your squad and the second the number of max soldiers your squad could have
if a red cross is visible, it means there is at least one soldier with a Medkit as a secondary item
Inventory[ | ]
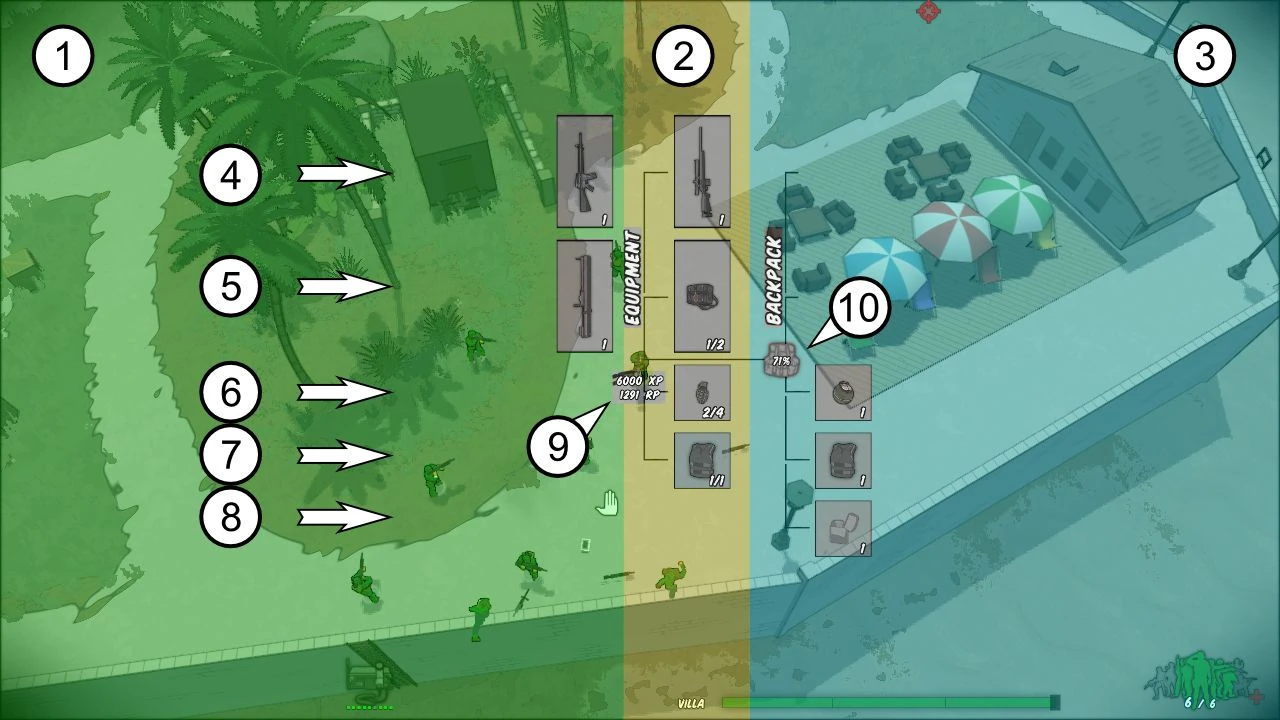
When you access the inventory, you will see a tree-like window centered on your soldier. It mainly consists of 3 containers, which have been highlighted in 3 different colors to make it easier to visualize.
To interact within the containers you can either drag & drop items from a container to another or press the mouse buttons.
LMB and the item will be equipped, no matter if it is in the world container or backpack.
RMB on an object which is in your equipment into the backpack, RMB on an object which is in your backpack will move it into the world container (e.g. on the ground, stash or armory in case you are interacting with those).
Holding Ctrl allows you to move a single item in/out of a stack.
| Hold | (by default) to call the inventory |
| "World container": it shows the items lying around your soldier OR in the armory/stash if the solider stands next to them | |
| Equipment: here are the directly useable items shown | |
| Backpack: here are the items that are in your backpack shown | |
| this row shows the primary weapons in each of the 3 containers | |
| this row shows the secondary weapons/items in each of the 3 containers | |
| this row shows the throwables (i.e. grenades) in each of the 3 containers | |
| this row shows the wearables in each of the 3 containers | |
| this row shows the valuables in the containers "world" or "backpack". Valuables Can not be stored in the equipment | |
| shows your actual experience and resource points | |
shows the percentage of encumbrancy. See Backpack |
 encumbrancy >100% |
Armory[ | ]
 |
Armory is a facility where the players can buy or/and sell weapons, valuables, vests, equipment, etc. In the game its function is most similar to a shop.
The currency used at the armory is RP or Resource points.
In the armories, the player can sell any kind of items, but can ONLY buy those weapons that belong to his own faction as well as those enemy weapons that are already unlocked for the same faction. |
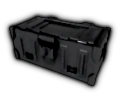
Stash[ | ]
 |
Stash is a storage place for all kinds of items, vests and weapons like duplicates of rare weapons, weapons which can not be used currently due to their higher XP requirement, various support equipment like medkits, explosives like C4, etc. and all other stuff that can be picked up at some later stage, if and when needed.
It's wise to place some extra equipment into the stash for a later use, in the event that you are not close to an armory but near to a stash. Items that you have stored to the Stash are saved and can be accessed through every stash within a map and are also available between rounds in a Singleplayer campaign or Online invasion. A stash can contain a maximum of 300 items in total (increased to 500 items if the player owns the Veteran Pack) but only 120 different types of items are shown.
The content of the stash is server specific and not carried over between servers unless you play on an official invasion server, which share the profiles (and saved items) between each other. |
Health system[ | ]
The health system in RWR is not the usual one most might be used to from many other shooters as you don't "take damage" in the traditional sense.
In fact, every bullet can kill at any moment. You don't have a health bar or any other indication that you've been hit for that matter (until you're dead, that is).
Every weapon has a different kill probability which is around 50% for assault rifles but can be up to 100% for some precise weapons like sniper rifles, e.g. if those hit you, you are dead.
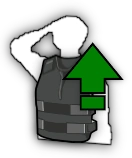
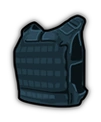
However, there is an armor type item in-game that comes a bit closer to a health-point system - a vest (to be more specific, the Vest Type II is used in this example).
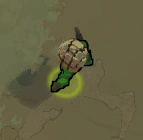
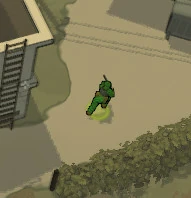
It gives you the ability to survive 3 lethal shots, each shot bringing its own consequences and damaging the vest. These vests can be bought at the Armory. Vests can also be worn by some AI soldiers - Vest Type II (hey, give them some fun too!) and by Elite soldiers (Officers) - Vest Type III. Vest Type III can be obtained by knifing enemy Elite soldiers (Officers) and the stabbed enemy will drop a vest down to 60% or can be found in a secret crates(unscathed). A vest icon is shown to the right of the grenade slot. You can recognize a vest-carrier by a darker vest model around his torso like on the picture below:
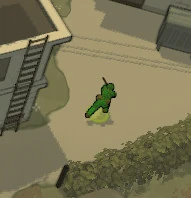 Soldier without vest |
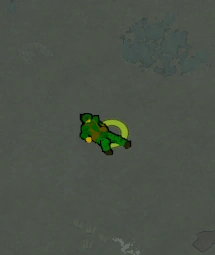
 Soldier with vest |
In the table below those 3 stages of the vest status are listed below:

|
The vest is pristine, no shots have been LETHAL toward you yet. In the case that you do get hit by a LETHAL bullet, the vest will absorb the bullet as if nothing had happened. Of course, this does damage it, and if you get shot by a lethal bullet again, there will be consequences.
|

|
This vest has absorbed ONE lethal bullet, and is slightly damaged, so the NEXT TIME you get hit by a LETHAL bullet, it will only protect you enough so that you escape unharmed, but as a consequence you will be stunned in pain on the ground for a few seconds, unable to move and very vulnerable to more shots, but if you can get up then you are alive if you manage to get away without being shot again. However, the vest will be damaged even more, and with that comes even more consequences.
|

|
This vest is torn up, and will only be enough to protect against ONE more LETHAL bullet. Even so, the vest will be so damaged that it can only stop you dying and instead inflict you with a wound. The vest will be completely destroyed. While wounded, you are permanently prone, and can only move very slowly. You can call for help by clicking the button you normally use to shoot (default is left mouse button). You can also still use your radio while wounded; and remember, every reinforcement call has at least one medic in it.
|
 Wounded soldier |
 Healing process |
Objectives and game modes[ | ]
Objectives[ | ]
For most maps, the ultimate objective of RWR is to capture the entire map. This is done by capturing the sectors shown in the map. The sectors shaded by your faction's color belong to you already.
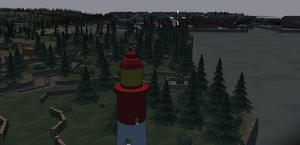
On King of the Hill type maps (Power Junction and Vigil Island), the objective is to capture the central base (which is a neutral zone at the beginning of the match) and hold it non-stop for the required amount of time. If the enemy faction take the "hill" back, the countdown timer will be reset.
Capturing Sectors[ | ]
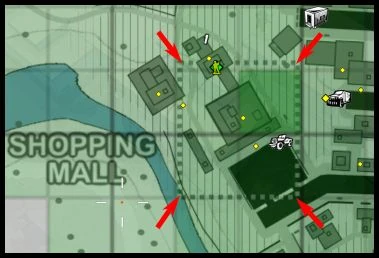
Capturing sectors is achieved by having more than 66% of the total troop count in the capture zone as denoted by a dashed square on the map for each sector (see image "capture zone example" below). As a sector is being captured, a timer will count down from 10 to 0 with an audible beeping sound. However, the last sector of the map will take 30 seconds to capture rather than the standard 10. If the countdown timer is interrupted (you suddenly have less than 66% of the total troop count), the timer will stop and restart next time you get more than 66% again.
The 66% mark are denoted by a vertical stroke (see image "capture force example"). If the black square is outside those vertical stroke, then it means that there are more than 66% of the forces of a faction inside the capture zone. In the specific example below, we have around 80% of the troups being the Graycollars, so that the timer is ticking down (6 seconds left to go before the base is captured by the attacking faction)
- Capture zone example
Since version 0.99.5 you can see the red target crosshair marker on top of your capture force bar when you are inside an enemy capture zone. On the other hand, you'll have a blue shield marker when you are inside an allied capture zone. This makes it easier for you to know if you are inside that zone than having to look at the map.
- Capture force example

- Capture base reward
Capturing a base gives an RP reward to every soldier inside that zone depending on how much time the base was under enemy control. If the base was under enemy control for 1 minute or less, 0 RP is rewarded. If the base was under enemy control for 10 minutes or more, 150 RP is rewarded. If the base was under enemy control for between 1 and 10 minutes, the RP reward is scaled linearly between 0 and 150, For example, you'll receive 60 RP for capturing a base that was under enemy control for 4 minutes, 120 for 8 minutes, etc.
Side Missions[ | ]
Capturing bases can be tough. There are a few, optional missions you can attempt on the side to help even the odds...
Seek
Be the eyes of your faction, perched up on rooftops or hidden deep in enemy territory. Spot vehicles and structures that will appear on the map for your whole team. Also gives a certain amount of RP.
Destroy
These targets of opportunity provide strategic abilities to the owning faction, and gives a certain XP and RP awards when destroyed:
- Radio Jammers
- Radar Towers
- Comms Truck
- Anti-Air Emplacements
- Mortar Ammunitions
- Miscellaneous structures (fuel tanks, water towers)
Rescue
Targets that will grant a one-time influx of 20 prisoners of your faction as a extra units upon their destruction:
Retrieve
- stealing and delivering cargo trucks unlocks an extra weapons or equipment
- sell these items to an armory to improve your faction's arsenal:
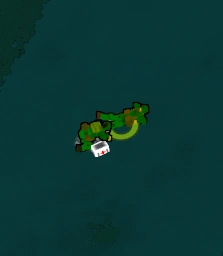
- briefcases and laptops, most commonly dropped by Elite soldiers (Officers)
- enemy's stock weapons
- to unlock an enemy stock weapon for your own faction, bring five pieces of a particular model to an armory
The unlocked weapons ends of stock after 4 hours. To re-unlock them you must repeat the same procedure.
Game Modes[ | ]
There are 8 game modes ingame right now: Quick Match, Invasion, Classic, Dominance, Minimodes, Teddy Hunt, Team elimination and Deathmatch.
- Quick Match is the "sandbox" standard game mode where all stock weapons are unlocked and players are free to join whichever faction they like. The rank which you start with can be set freely. In this mode you can capture any base you want as there are no restriction rules. This mode in online can only be hosted as a client server.
- Classic is similar to Quick Match but has a few more defined rules like round timers and a map rotation. On most server it is also set that you can only capture 1 base (server admin can customize that) to avoid backdooring and base capture rotation. This mode in online can only be hosted as a dedicated server.
- Invasion is a coop campaign type game mode where everyone joins the same faction: Brownpants (as of 1.5). In the join server menu, you will be defaulted to Graycollars no matter what. Along with this game mode being coop, there are a couple major differences from the standard quick match, such as specific side missions. Another difference is that the XP progression is around 73% slower and your progression throughout the campaign is persistent (XP/RP/stash content). There is also an official invasion server realm consisting in a few servers which share the profile with each other so that you can play on one of them and switch to another one and continue with the same progression. Invasion can either be hosted as a client server (start campaign and activating your game online for others to join) or as dedicated server.
- The Dominance mode is a modified version of Classic focusing more on persistency and slower progression, similar to Invasion in that regard. This mode in online can only be hosted as a dedicated server.
Main features:
1) Persistent profiles: when you leave the match, you'll still have the equipment/XP/RP/stats you had when you join again
2) FoV is enabled on default which means you won't see the enemies/items/vehicles when your soldier doesn't have a direct visual line of sight to them
3) Overall/Match stats (on the scoreboard (default F1), you can switch between them by pressing the top banner)
4) No death penalty (No XP lost)
5) Lower equipment requirement for most items
6) Max amount of AI soldiers under your control is 4 (instead of 10 in other modes)
7) No elites, no valuables drops and no rare weapons
8) Killing a bot gives you 2XP+1RP, killing a human 20XP+20RP, capturing a base up to 50RP. Spotting and destroying of vehicles give less reward than in invasion
9) Max time a map lasts is 30 minutes. If noone won after the time ran out, the faction with the most bases will be victorious
10) extended single base capture system where sometimes you have more than one base that can be captured at time, the main objective which is the bigger red marker and optional smaller red markers. The AI commander will only target the main objective but players are free to choose which base to capture
11) Some maps have bases left out to keep the fighting territory smaller
- In Minimodes, a map consists in having different sub-stage modes, such as Team Deathmatch, Team Teddy Hunt, King of the Hill, Delivery (not yet), Target (not yet). The sub-stages are usually 2-3 bases, keeping the playfield tight. Leaving the battle zone is not possible as there is a death-zone around the sub-stages. In minimodes the match starts only when a set number of humans join, default being 2. There are also a few bots but those will vanish once there are enough people in. This mode in online can only be hosted as a dedicated server.
- Teddy Hunt is a variance of Capture the flag. You have special crates somewhere on the map (the commander will indicate you roughly where it is) that need to be destroyed and a teddy bear will be dropped. These will need to be sold at an armory (or mobile armory) to make your team score. The enemy team(s) need to do the same and also prevent you in doing so. The special crates are defended by the Teddy Guardians, an AI faction.
The winner of the round is the faction who delivered the most teddies. This mode in online can only be hosted as a dedicated server.
- In Team elimination, your goal is to either annihilate the entire enemy team or to destroy the enemy Comms truck. In this case, your team will score and a new round will start. There are NO bots in this mode, it's pure PVP and FoV is enabled on default (you only see enemies/vehicles when you have direct vision to them, e.g. you won't see an enemy if there is a building between you and him). When you die in this mode you won't be able to respawn until the round has ended. You will have an extended view to be able to see what your team mates are doing. There is only one map so far which has been specifically designed for this game mode. This game mode can only be hosted throughout a dedicated server. The server starts in a warmup phase and the real match starts after you type "/start" in the chat.
- In Deathmatch, the goal is self explanatory. You score for each kill you achieve. You can change your appearance by changing your "costume" at an armory. If you respawn, the server will choose a spawnpoint where there is no enemy around. There are NO bots in this mode, it's pure PVP. This mode in online can only be hosted as a dedicated server.
- Man vs World is a purely single player campaign in which the player is the sole soldier. The player has to capture all of the bases in the map in order to progress to the next map. Permadeath is enabled for both the player and AI. However, the player is able to sustain 10 shots before dying. There is also a veteran mode in which fov(field of view) is enabled.
Weapons and equipment[ | ]
Primary (stock) weapons are the weapons available in Armory (including the unlocked ones) with which the soldiers respawn.
If the soldier dies, he will respawn with the same stock weapon/secondary equipment from his own faction or with some other stock weapon/secondary equipment that is already unlocked for the faction.
Common soldiers always spawn with an unlocked primary weapon with unlimited ammunition.
On death, dropped stock weapon/equipment stays on the ground for 45 seconds, then disappears.
Rare weapons are used by Elite soldiers (Officers) instead of the usual pool of faction's specific stock weapons used by common soldiers.
On death, a rare weapon is always dropped (except due to death caused by team-killing) and stays on the ground for 90 seconds (compared to 45 seconds for the stock weapons/equipment and 120 seconds for the valuables/armor), then disappears.
Keep in mind that if you die with a rare weapon or with a weapon that is no longer available at Armory, you'll respawn with a random stock weapon.
Unlike the stock weapons, rare weapons cannot be unlocked by selling 5 pieces of type to an armory!
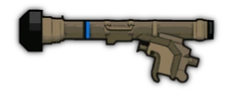
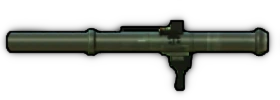
Secondary weapons/support equipment have some kind of limitation. Rocket launchers have only one shot each. Silenced pistols have unlimited ammunition but a very low chance to kill (compared to stock weapons) unless you are undetected.
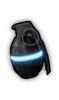
Throwables are the grenades/explosives that can be thrown/planted with the grenade key (default G). The number you can carry is determined by your rank.
Mounted weapons are fixed emplacements that cannot be moved. Some are built from player's equipment, some other are mounted on vehicles/structures.
Armor (vest) is the decisive factor in how you handle the bullets. It has a few layers that reduce the damage you take, thus providing you protection. Requires no button presses to be active.
Equipment (as sandbags, MGs, TOWs) is deployable and will remain there unless destroyed. Can be used by friends and foes.
Notes:
(UPDATED as of 1.91)
- Most weapons affects player's speed - you will run slower with a sniper rifle than with a shotgun
- Unlockable weapons are available after completing a certain task (delivering Cargo Trucks, selling Briefcases and Laptops at Armory)
- All the enemy's primary stock weapons can be unlocked by selling 5 pieces of the particular type to an Armory. Once unlocked, the weapon will be available at Armory (in Invasion unlocks last 4 (four) hrs. net time, in Single Player Campaign it lasts 100 (one hundred) hrs.) then it will get out of stock and the procedure must be repeated to unlock it again!
- All kinds of weapons, equipment and items can be obtained by:
- purchasing from the Armory / swapping out of the Stash
- picking up one lying on the battlefield
- breaking one of the normal crates that can be found everywhere on the maps/ destroying a special crate that can be found on some places
- Community/Gift Boxes and Lottery Tickets
Table explanation
Chance, probability and likeliness may be used interchangeably. "Round" is slang for bullet.
- Image; Name; Type - exactly what you think.
- Faction - which faction's armory this spawns in.
- Price - cost to buy or sell the weapon/equipment/item.
- Magazine size - bullets fired before needing to reload.
- Fire rate - rounds (bullets) per minute (number of bullets the weapon would fire for a minute at an infinitely large magazine).
- Accuracy factor (higher is better) - the chance that the bullet will hit the target if properly aimed (and at a green crosshair). E.g.: 1 is always, 0 is never. Some weapons have an accuracy factor of 1 but actually have less maximum accuracy because they are limited by stance accuracy modifiers. Ex. the standard assault rifles have a maximum accuracy of 0.95 due to the highest modifier (for being prone) being 0.95
- Recoil (lower is better) - the amount of accuracy decreasing by every second during firing.
- Recoil recovery (higher is better) - the amount recoil is reduced for every second during which the weapon does not shoot.
- Kill probability (higher is better) - the chance that the bullet will kill when it hits someone. E.g.: 1=100%; 0.5=50%
- Fall-Off Start (higher is better) - optimal distance for accurate shooting. Falloff is the max range where weapons retain 100% of their effective kill chance. Distance beyond falloff will have a gradual linear decrease in kill probability until it hits 0 at max range. E.g.: one way to measure is that the tanks are approximately 8-10m. long. One screen distance (top to bottom) is approximately 30m. Binoculars can be used to measure precise distances.
- Max range (higher is better) - the maximum distance for a weapon to be able to kill, once the bullet reaches max range, it will have 0% kill chance
- Speed modifier (higher is better) - affects the movement speed while the soldier is currently holding the weapon/equipment in his hands. Speed modifier for body armor being worn is stacked with speed modifier for equipment a soldier is holding.
- Commonness - the chance that the weapon will be spawned when a soldier dies instead of the weapon he was using. Also used to determine the chance that newly spawned AI soldiers will spawn with the weapon
Unrelated to weapon's performance.
NOTE*** Zoom this page all the way out for best view experience.
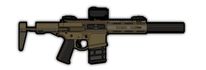
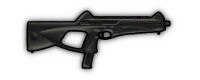
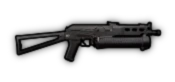
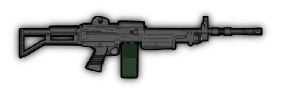
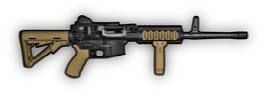
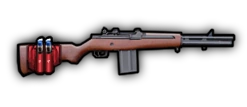
Primary Assault rifles[ | ]
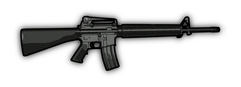
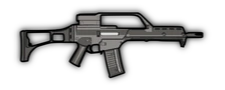
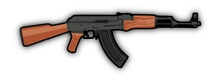
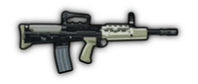
| Image | Name | Type | Faction | Price (RP) | Magazine size | Fire rate (RPM) | Accuracy factor | Recoil | Recoil recovery | Kill probability | Fall-off Start(m) | Max range(m) | Bullet Speed(m/s) | Speed mod(%) | Commonness |
|---|---|---|---|---|---|---|---|---|---|---|---|---|---|---|---|
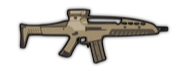
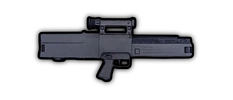
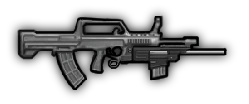
|
M16A4 | Assault rifle, full-auto | Greenbelts/
Unlockable |
2 | 30 | 531 | 1 | 0.34 | 1.4 | 0.5 | 34 | 67 | 100 | -3.6 | 0.2 (70%) |
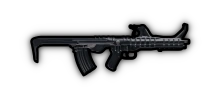
|
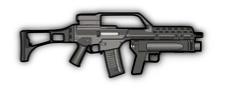
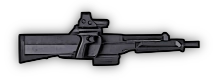
G36 | Assault rifle, full-auto | Graycollars/
Unlockable |
2 | 30 | 545 | 1 | 0.36 | 1.38 | 0.5 | 35 | 70 | 100 | -1.8 | 0.2 (70%) |
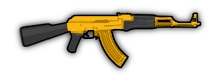
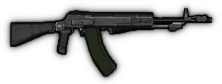
|
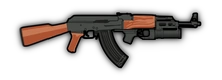
AK47 | Assault rifle, full-auto | Brownpants/
Unlockable |
2 | 30 | 488 | 1 | 0.4 | 1.2 | 0.55 | 33 | 68 | 100 | -2 | 0.2 (70%) |
|
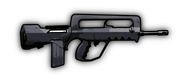
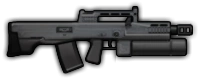
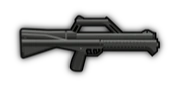
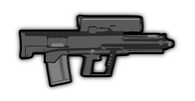
L85A2 | Bullpup assault rifle, 3-round burst | Greenbelts/
Unlockable |
8 | 30 | 632 | 1 | 0.35 | 1.4 | 0.55 | 36 | 66 | 100 | -3 | 0.0003 (0.07%) |
|
FAMAS G1 | Bullpup assault rifle, 3-round burst | Graycollars/
Unlockable |
8 | 25 | 750 | 1 | 0.32 | 1.4 | 0.55 | 37 | 65 | 100 | -2 | 0.0003 (0.07%) |
|
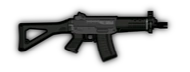
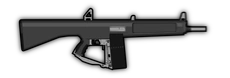
SG 552 | Assault rifle, semi-auto | Brownpants/
Unlockable |
10 | 30 | 600 | 1 | 0.32 | 1.4 | 0.57 | 33 | 68 | 100 | 0 | 0.0003 (0.07%) |
|
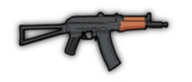
AKS-74U | Assault rifle, full-auto | Rare/Ice Cream Van (200 rp) | 80 | 30 | 612 | 1 | 0.6 | 2.5 | 0.6 | 38 | 52 | 100 | 0 | 0.0005 |
|
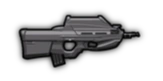
F2000 | Bullpup assault rifle, full-auto | Rare/Ice Cream Van (200 rp) | 80 | 30 | 545 | 1 | 0.25 | 0.8 | 0.58 | 45 | 75 | 100 | -4 | 0.0006 |
|
XM-8 | Assault rifle, full-auto | Rare/Ice Cream Van (200 rp) | 80 | 30 | 545 | 1 | 0.28 | 1.0 | 0.55 | 42 | 75 | 100 | -4 | 0.0004 |
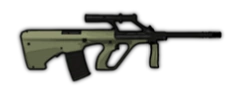
|
Steyr AUG | Bullpup assault rifle, full-auto,
1.3x zoom, high-velocity |
Rare | 180 | 42 | 488 | 1 | 0.36 | 1.0 | 0.55 | 54 | 90 | 120 | -4 | 0.0002 |
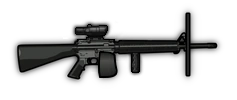
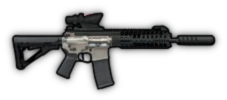
|
M16A4 -
Shield and Scope |
Assault rifle, full-auto, fire while crouch,
small ballistic shield, 1.2x scope |
Gift Box | 90 | 100 | 531 | 1 | 0.3 | 1.4 | 0.5 | 34 | 67 | 100 | -8 | 0 |
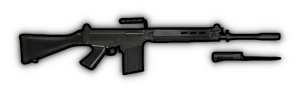
|
FN FAL | Battle rifle, full-auto, optional 3m bayonet
(bayonet has less stand/crouch accuracy) |
Gift Box | 420 | 20 | 531 | 1 | 0.4 | 1.1 | 0.58 | 42 | 75 | 100 | -3.6 | 0 |
|
G11 | Assault rifle, optional 3-round burst,
1.2x zoom (non-burst stats in parenthesis) |
Gift Box | 440 | 45 | 3000 (462) | 1 | 0.10 (0.3) | 0.4 (1.3) | 0.53 | 40 | 64 | 100 | -2 | 0 |
|
TKB-059 | Assault rifle, full-auto, triple barrel | Gift Box | 630 | 30 | 488 | 0.96 | 0.5 | 1.1 | 0.5x3 | 25 | 58 | 100 | -3 | 0 |
|
Golden AK47 | Assault rifle, full-auto, shiny | Gift Box | 3000 | 30 | 488 | 1 | 0.4 | 1.2 | 0.55 (50% chance to deal double damage on hit) | 36 | 75 | 110 | -10 | 0 |
|
P416 | Silenced assault rifle, 1.1x scope, full-auto | Gift Box | 416 | 30 | 531 | 1 | 0.4 | 1.2 | 0.52 | 30 | 62 | 100 | -4 | 0 |
|
AK47 w/ GP25 GL | Assault rifle, full-auto,
alternate single-shot grenade launcher 10% drop chance from Ranger (GL functions identically to the M79) |
Brownpants/Gift Box | 250 | 30 | 488 | 0.95 | .35 | 1.2 | 0.55 | 33 | 68 | 100 | -12 | 0
|
|
G36 w/ AG36 GL | Assault rifle, full-auto,
alternate single-shot grenade launcher 10% drop chance from Ranger (GL functions identically to the M79) |
Graycollar/Gift Box | 250 | 30 | 545 | 0.95 | 0.31 | 1.38 | 0.5 | 35 | 70 | 100 | -11.8 | 0
|
|
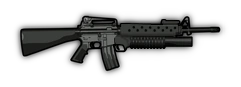
M16A4 w/ M203 GL | Assault rifle, full-auto,
alternate single-shot grenade launcher 10% drop chance from Ranger (GL functions identically to the M79) |
Greenbelt/Gift Box | 250 | 30 | 531 | 0.95 | 0.29 | 1.4 | 0.5 | 34 | 67 | 100 | -13.6 | 0
|
|
ASh-12.7 | Assault rifle, full-auto,
alternate suppressed flashbang launcher (3.5m radius stun, stats in parenthesis) |
Gift Box | 721 | 20 (3) | 545 (120) | 1 (0.9) | 2.0 (1.5) | 1.5 (0.5) | 0.75 | 40 | 60 | 100 (60) | -10 | 0 |
|
QBZ-95 | Assault Rifle, full-auto, underbarrel shotgun (underbarrel stats in parenthesis) | Gift Box | 280 | 30 (4) | 500 (333) | 0.95 (0.75) | 0.42 (1.3) | 1.3 (0.8) | 0.53 (0.62x4) | 35.2 (19.6) | 59.9 (29.8) | 95 (85) | -8 | 0 (Found in Community Box 3 and Pumpkin Box only) |
|
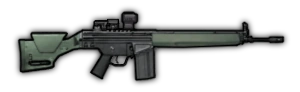
G3A3 | Assault Rifle, full-auto, alternate semi-auto mode w/ 1.35x scope (semi-auto stats in parenthesis) | Gift Box | 490 | 20 | 500 (300) | 1 | 0.5 (0.6) | 1.8 | 0.6 | 40.3 | 89.7 | 115 | -4 | 0 (Found in Community Box 1 and Pumpkin Box only) |
|
Gilboa DBR | Assault Rifle, semi-auto, double barrel (consumes 2 ammo per shot) | Gift Box | 150 | 60 | 3000 | 1 | 0.27 | 1.2 | 0.5 | 38 | 52 | 100 | -5 | 0 (Community Box 7) |
|
AN-94 | Assault Rifle, full-auto, alternate 2-round burst mode (2-round burst stats in parenthesis) | Gift Box | 250 | 45 | 588 (1714) | 1 | 0.35 (0.15) | 1.34 (0.6) | 0.5 | 32 (38.4) | 69 (82.8) | 100 (120) | -3.2 | 0 (Community Box 7) |
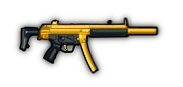
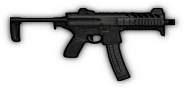
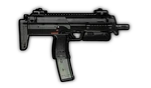
Supressed Submachineguns[ | ]
| Image | Name | Type | Faction | Price (RP) | Magazine size | Fire rate (RPM) | Accuracy factor | Recoil | Recoil recovery | Kill probability | Fall-off Start(m) | Max range(m) | Bullet Speed(m/s) | Speed modifier(%) | Commonness |
|---|---|---|---|---|---|---|---|---|---|---|---|---|---|---|---|
|
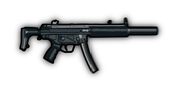
MP5SD | Submachine gun, suppressed | Greenbelts/
Unlockable |
4 | 30 | 652 | 1 | 0.7 | 2.2 | 0.4 | 24 | 40 | 105 | 0 | 0.00001 |
|
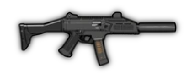
Scorpion Evo III | Submachine gun, suppressed | Graycollars/
Unlockable |
4 | 30 | 800 | 1 | 0.68 | 2 | 0.36 | 22 | 36 | 100 | 0 | 0.00001 |
|
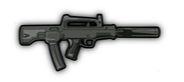
QCW-05 | Bullpup submachine gun, suppressed | Brownpants/
Unlockable |
4 | 50 | 706 | 1 | 0.62 | 2 | 0.35 | 22 | 35 | 100 | 0 | 0 |
|
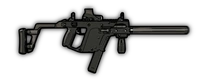
KRISS Vector | Submachine gun, suppressed | Rare | 250 | 25 | 845 | 1 | 0.82 | 3.0 | 0.42 | 28.6 | 44 | 110 | 0 | 0.0001 |
|
AAC Honey Badger | Personal Defense Weapon,
3-round burst, suppressed |
Gift Box | 390 | 30 | 800 | 1 | 0.38 | 1.3 | 0.45 | 35.7 | 54.6 | 105 | -2 | 0 |
|
Golden MP5SD | Submachine gun, supressed, shiny | Gift Box | 2500 | 30 | 652 | 1 | 0.7 | 2.2 | 0.4 | 25.3 | 41.8 | 110 | -6 | 0 |
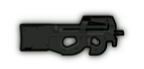
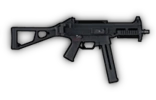
Assault Submachineguns[ | ]
| Image | Name | Type | Faction | Price (RP) | Magazine size | Fire rate (RPM) | Accuracy factor | Recoil | Recoil recovery | Kill probability | Fall-off Start(m) | Max range(m) | Bullet Speed(m/s) | Speed mod(%) | Commonness |
|---|---|---|---|---|---|---|---|---|---|---|---|---|---|---|---|
|
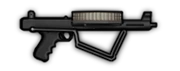
P90 | Personal Defense Weapon | Rare/Secret crate | 100 | 50 | 857 | 1 | 0.58 | 3 | 0.57 | 32 | 44 | 100 | 0 | 0.0005 |
|
UMP40 | Submachine gun
10% drop chance from elite paratrooper |
Greenbelts/
Non-unlockable |
10 | 30 | 667 | 1 | 0.8 | 2.4 | 0.5 | 33 | 43 | 100 | 0 | 0.00001 |
|
MX4 Storm | Submachine gun
10% drop chance from elite paratrooper |
Graycollars/
Non-unlockable |
10 | 30 | 952 | 1 | 0.5 | 2 | 0.5 | 35 | 41 | 100 | 0 | 0.00001 |
|
PP-19 Bizon | Submachine gun
10% drop chance from elite paratrooper |
Brownpants/
Non-unlockable |
10 | 64 | 706 | 1 | 0.6 | 2.2 | 0.5 | 28 | 41 | 100 | 0 | 0.00001 |

|
Suomi | Submachine gun, accurate while walking. | Gift Box | 300 | 71 | 750 | 0.9 | 0.36 | 3.0 | 0.5 | 30 | 45 | 100 | 0 | 0 |
|
MPX | Submachine gun, optional magazine with hollow point bullets (hollow point stats in parenthesis) | Gift Box | 300 | 30 | 822 | 1 | 0.33 (0.4) | 2.5 | 0.5 | 29.4 (28) | 37.8 (36) | 105 (100) | 0 | 0 |
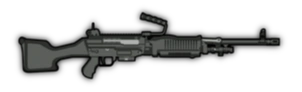
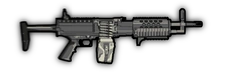
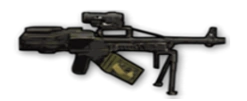
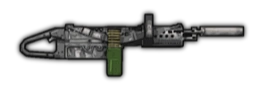
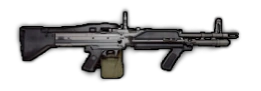
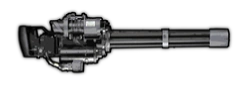
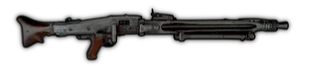
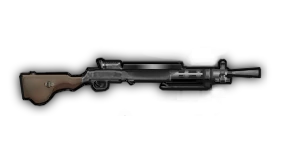
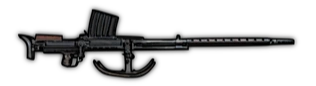
Primary light, medium, and general purpose machineguns[ | ]
| Image | Name | Type | Faction | Price (RP) | Magazine size | Fire rate (RPM) | Accuracy factor | Recoil | Recoil recovery | Kill probability | Fall-off Start(m) | Max range(m) | Bullet Speed(m/s) | Speed modifier(%) | Commonness |
|---|---|---|---|---|---|---|---|---|---|---|---|---|---|---|---|
|
M240 | Medium machine gun | Greenbelts/ Unlockable | 2 | 100 | 723 | 0.62 | 0.8 | 0.8 | 0.67 | 35 | 70 | 100 | -10 | 0.05 (16.6%) |
|
IMI Negev | Light machine gun | Graycollars/ Unlockable | 2 | 100 | 779 | 0.63 | 0.8 | 0.8 | 0.65 | 45 | 78 | 110 | -8 | 0.05 (16.6%) |

|
PKM | Light machine gun | Brownpants/ Unlockable | 2 | 150 | 652 | 0.56 | 0.8 | 0.9 | 0.63 | 33 | 66.5 | 95 | -6 | 0.05 (16.6%) |
|
Stoner LMG | Light machine gun | Rare / Secret crate | 160 | 80 | 600 | 0.75 | 0.8 | 0.9 | 0.6 | 35 | 75 | 100 | -7 | 0.0003 |

|
Stoner 62 | Light machine gun, full-auto,
1.4x zoom |
Rare | 450 | 20 | 652 | 0.92 | 0.35 | 1.4 | 0.7 | 52.8 | 99 | 110 | -6 | 0.00002 |
|
ARES Shrike | Light machine gun,
6 round burst / semi-auto |
Gift Box | 300 | 60 | 705 (400) | 0.9 | 0.1 | 0.4 | 0.57 | 38 | 70 | 100 | -7 | 0 |
|
Pecheneg Bullpup | Bullpup machine gun, 1.2x zoom | Rare | 430 | 150 | 545 | 0.8 | 0.7 | 1.4 | 0.7 | 42 | 90 | 100 | -8 | 0.00005 |
|
KAC Chain SAW | Light machine gun, full-auto,
suppressed |
Rare | 550 | 150 | 1200 | 0.55 | 1.5 | 1.5 | 0.46 | 30 | 72 | 100 | -42 | 0.00005 |
|
M60 | Machine gun | Gift Box | 700 | 100 | 600 | 0.725 | 2.5 | 1.15 | 0.71 | 35 | 65 | 100 | -11 | 0 |
|
WB-II Microgun | Heavy machine gun | Rare | 800 | 200 | 1875 | 0.55 | 1.5 | 0.7 | 0.5 | 30 | 72 | 120 | -45 | 0.00004 (0,0039%) |
|
MG42 | Machine gun | Very rare | 1200 | 150 | 1200 | 0.7 | 0.2 | 0.9 | 0.62 | 42 | 90 | 120 | -12 | 0.00001 (0,00074%) |

|
RPD | Machine gun with optional bipod
(bipod stats in parenthesis) |
Gift Box | 610 | 100 | 652 | 0.7 | 0.8 (0.4) | 0.82 (1.3) | 0.6 (0.62) | 30 (35) | 70 | 100 | -9.2 (-13) | 0 |

|
Ultimax 100 | Negative recoil machine gun, optional assault rifle mode (AR mode stats in parenthesis) | Gift Box | 800 | 100 (30) | 667 (600) | 0.8 (0.85) | -0.15(-0.2) | -1.2 (-1.35) | 0.6 | 51 (52) | 63.7 (65) | 98 (100) | -10 (-7) | 0 |
|
DP28 | LMG with optional shield (shield can only shoot prone, stats in parenthesis) | Gift Box | 280 | 47 | 600 | 0.78 | 1 (0.8) | 2.4 | 0.65 | 36.3 | 70.4 | 110 | -10 (-30) | 0 (limited duration: Halloween Box only, will likely be added to another box soon) |
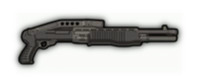
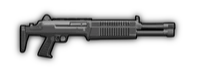
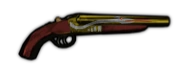
Primary Shotguns[ | ]
| Image | Name | Type | Faction | Price (RP) | Magazine size | Fire rate (RPM) | Accuracy factor | Recoil | Recoil recovery | Kill probability | Fall-off Start(m) | Max range(m) | Bullet Speed(m/s) | Speed modifier(%) | Commonness |
|---|---|---|---|---|---|---|---|---|---|---|---|---|---|---|---|

|
Mossberg 500 | Shotgun, pump-action | Greenbelts/
Unlockable |
2 | 8 | 60 | 0.75 | 2 | 0.9 | 0.6x5 | 21.5 | 25.8 | 86 | 0 | 0.01 |
|
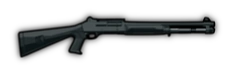
SPAS-12 | Shotgun, pump-action | Graycollars/
Unlockable |
2 | 8 | 60 | 0.68 | 2 | 0.9 | 0.62x6 | 21.6 | 26.1 | 90 | -2 | 0.01 |
|
QBS-09 | Shotgun, semi-auto | Brownpants/
Unlockable |
2 | 10 | 150 | 0.74 | 2 | 0.9 | 0.59x5 | 19.8 | 27.5 | 86 | 0 | 0.01 |
|
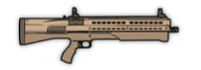
UTS-15 | Bullpup pump-action shotgun | Uncommon/
EOD |
20 | 14 | 120 | 0.75 | 2 | 0.9 | 0.65x6 | 23 | 27.5 | 100 | -3 | 0.004 |
|
Neostead 2000 | Bullpup pump-action shotgun | Rare | 100 | 10 | 60 | 0.8 | 2 | 0.9 | 0.7x4 | 31.5 | 36 | 90 | 0 | 0.0005 |

|
Pepperdust | Pump-action shotgun,
stun only, supressed |
Rare | 100 | 15 | 60 | 0.8 | 2 | 0.6 | Stun 0.65x10 | 22.4 | 32 | 80 | +6 | 0.0006 |
|
Benelli M4 | Shotgun, semi-auto | Rare /
Secret crate |
200 | 12 | 180 | 0.8 | 2 | 0.9 | 0.65x5 | 23.5 | 30.1 | 94 | 0 | 0.0006 |

|
Benelli M4
suppressed |
Shotgun, semi-auto, silenced (swap from Benelli M4) | Rare | 200 | 8 | 180 | 0.78 | 2 | 0.8 | 0.65x5 | 19.8 | 34.2 | 90 | 0 | 0.0001 |
|
AA-12 | Assault shotgun, full-auto,
full magazine reload |
Rare | 150 | 20 | 240 | 0.9 | 0.6 | 0.6 | 0.5x3 | 28.5 | 38 | 95 | 0 | 0.0002 |
|
Jackhammer | Shotgun, full-auto,
full magazine reload |
Rare | 350 | 10 | 240 | 0.9 | 0.7 | 1.4 | 0.6x3 | 31.4 | 49 | 98 | -4 | 0.0001 |

|
TTI-Combat Shield | Pump-action shotgun,
ballistic shield |
Gift Box | 210 | 3 | 60 | 0.7 | 2.0 | 0.9 | 0.6x6 | 22.5 | 27 | 90 | -35
(-32 for EOD AI) |
0 |

|
KSxS-6 Hunter | Double-barreled shotgun,
can fire one or both barrels |
Gift Box | 400 | 2 | N/A | 0.75 | 2.0 | 1.0 | 0.6x6
(Special: each pellet deals 2 damage) |
9 | 63 | 90 | -2 | 0 |
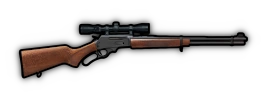
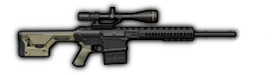
Primary Snipers and designated marksman rifles[ | ]
| Image | Name | Type | Faction | Price (RP) | Magazine size | Fire rate (RPM) | Accuracy factor | Recoil | Recoil recovery | Kill probability | Fall-off Start(m) | Max range(m) | Bullet Speed(m/s) | Speed modifier(%) | Commonness |
|---|---|---|---|---|---|---|---|---|---|---|---|---|---|---|---|

|
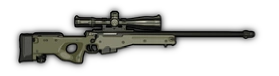
M24-A2 | Sniper rifle, bolt-action, 1.6x zoom | Greenbelts/
Unlockable |
4 | 10 | N/A | 1 | 3 | 0.55 | 1 | 99 | 144 | 180 | -7 | 0.01 (2.3%) |
|
PSG-90 | Sniper rifle, bolt-action, 1.6x zoom | Graycollars/
Unlockable |
4 | 10 | N/A | 1 | 3 | 0.5 | 1 | 104.5 | 152 | 190 | -6 | 0.01 (2.3%) |
|
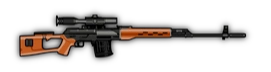
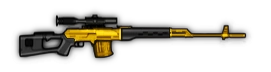
Dragunov SVD | Sniper rifle, semi-auto, 1.45x zoom | Brownpants/
Unlockable |
4 | 10 | 80 | 1 | 3 | 0.87 | 0.9 | 101.8 | 129.5 | 185 | -4 | 0.01 (2.3%) |

|
APR | Sniper rifle, bolt-action,
1.45x zoom, suppressed |
Unlockable/
Lone Wolf |
25 | 5 | N/A | 1.0 | 3.0 | 0.7 | 0.85 | 78 | 120 | 160 | -9 | 0.00001 |
|
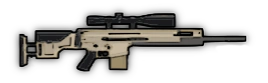
SCAR-SSR | Designated marksman rifle, semi-auto,
1.5x zoom |
Rare | 320 | 20 | 120 | 1 | 2 | 1 | 1.0 | 81.6 | 136 | 170 | -8 | 0.0002 |

|
VSS Vintorez | Designated marksman rifle, full-auto,
1.3x zoom, supressed |
Rare | 200 | 20 | 300 | 0.9 | 3 | 3 | 0.8 | 78 | 120 | 120 | -5 | 0.0002 |
|
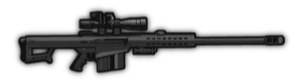
Barrett M107 | Sniper rifle, semi-auto,
body-armor piercing, can crouch fire, 1.65x zoom |
Rare | 250 | 10 | 60 | 1 | 3 | 0.8 | 3.01 | 108 | 180 | 180 | -15 | 0.0001 |
|
Lahti L-39 | Sniper rifle, semi-auto,
explosive rounds, 1.35m radius, can pierce through bodies, 1.65x zoom |
Very rare | 1000 | 10 | 50 | 1 | 1 | 0.85 | 5xExplosive (20) | - | - | 160 | -17 | 0.000005 (0,00037%) |
|
M711-LA Enforcer | Designated marksman rifle, lever action,
can reload 1 round at a time, 1.3x zoom |
Gift Box | 330 | 8 | N/A | 1 | 2.5 | 0.9 | 1.2 | 50.7 | 80.6 | 130 | -8 | 0
(Found in Community Box 3) |

|
M6 Lynx | Sniper rifle, semi-auto, body-armor piercing,
1.65x zoom, suppressed |
Gift Box/
Lone Wolf |
300 | 5 | 60 | 1 | 3.0 | 0.9 | 1.5 | 90 | 150 | 150 | -16 | 0.000001 and |
|
M14k | Automatic marksman rifle, scopeless, but with optional stim-pack mode | Gift Box | 390 | 10 | 561 | 1 | 2.5 | 0.9 | 0.75 | 54 | 72 | 120 | -2 | 0 (Found in Community Box 5 and Pumpkin Box only) |
|
FD338 | Semi-auto sniper rifle, 1.55x zoom, (optional supressor) | Gift Box | 338 | 10 | 200 (150) | 1 (0.95) | 2.4 (2.2) | 1.1 | 0.9 (0.8) | 93.6 (67.5) | 147.6 (112.5) | 180 (150) | -10 | 0 (Found in Community Box 4 and Pumpkin Box only) |
|
Golden Dragunov SVD | Sniper rifle, shiny, semi-auto, 1.45x zoom | Gift Box | 3100 | 10 | 80 | 1 | 3 | 0.87 | 1 | 104.5 | 133 | 190 | -10 | 0 (Found in Titan Box and Pumpkin Box only) |

|
SKS | Designated marksman rifle, semi-auto, 1.45x zoom, optional magazine with incendiary rounds
|
Gift Box | 400 | 20 (10) | 231 (286) | 1 (0.95) | 0.72 (1) | 1 | 0.85 (1) | 81.6 (50) | 127.5 (50) | 170 (100) | -4 | 0 |
Primary explosives[ | ]
| Image | Name | Type | Faction | Price (RP) | Magazine size | Fire rate (RPM) | Accuracy factor | Recoil | Recoil recovery | vehicle damage | Projectile Speed(m/s) | Speed modifier(%) | Commonness |
|---|---|---|---|---|---|---|---|---|---|---|---|---|---|
|
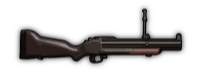
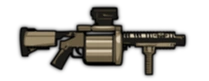
M79 Grenade launcher | Grenade launcher, single shot,
4.5m radius |
Greenbelts/
Unlockable |
25 | 1 | N/A | 0.8 | 3 | 0.2 | 55 | 120 | -12 | 0.002 (0.3%) |
|
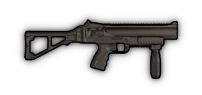
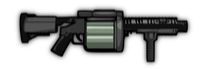
GL06 Grenade launcher | Grenade launcher, single shot,
4m radius |
Graycollars/
Unlockable |
25 | 1 | N/A | 0.8 | 3 | 0.2 | 50 | 120 | -10 | 0.002 (0.3%) |
|
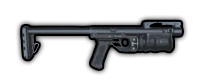
RGM-40 Kastet | Grenade launcher, single shot,
6m radius |
Brownpants/
Unlockable |
25 | 1 | N/A | 0.8 | 3 | 0.2 | 70 | 120 | -12 | 0.002 (0.3%) |
|
MGL Flasher | Grenade launcher, semi-auto,
1.1x zoom, stun grenades, 8m radius, full reload |
Rare | 200 | 6 | 75 | 0.9 | 4.0 | 1.0 | 0 | 110 | -14 | 0.0002 |
|
Milkor MGL | Grenade launcher, semi-auto,
4.2m radius, reloads 1 round at a time |
Very rare | 650 | 6 | 75 | 0.9 | 4.0 | 1.0 | 65 | 110 | -14 | 0.00001(0,001%) |
|
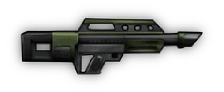
XM-25 | Air-burst grenade launcher, semi-auto,
1.2x zoom, 4.2m radius. Alt-fire remote detonation mode. |
Secret crate/ | 200 | 4 | 35 | 1 | 2.3 | 0.5 | 45 | 40 | -12 | 0
(Secret crates / Blue Box) |
|
PAW-20 | Grenade launcher , semi-auto,
1.2x zoom, 3.5m radius |
Rare/ | 350 | 7 | 54 | 1 | 2.8 | 1.0 | 40 | 70 | -10 | 0.00005
(Also found in Titan Boxes) |
|
Javelin, anti-personnel
(APJ) |
Airburst clusterbomb launcher.
10 bombs, 2.5m radius per bomb |
Gift Box | 999 | 1 | N/A | 1.0 | N/A | N/A | 16 x10 | 100 | -20 | 0 |
|
PF-98 rocket launcher | Reloadable rocket launcher,
1.45x zoom, 4.8m radius |
Gift Box | 980 | 1 | N/A | 1 | 0.4 | 1.5 | 520 | 75 | -45 | 0 |
| RWM Mortar | Portable mortar, 1.55x zoom,
6m radius |
Gift Box | 380 | Unlimited | N/A | 0.95 | 1 | 0.3 | 152 | 100 | -45 | 0 | |
|
Kulakov | Incendiary grenade launcher,
semi-auto, full reload |
Gift Box | 530 | 5 | N/A | 0.8 | 3.5 | 0.2 | 20 | 110 | -15 | 0 |
Notes:
- All explosive weapons have a 100% kill chance, if an explosive deals over 100 damage it rips through more vest layers. 100+ damage counts as 200% kill chance and therefore 2 layers, and any explosive dealing over 200 damage jumps to counting as 300% kill chance and therefore 3 layers, and so on.
- Weapons with lower then 17 damage can not damage armored vehicles, example the Anti personnel javelin does so low damage that it can not damage tanks or other armored vehicles which have around 600 health minimum
Primary special[ | ]
| Image | Name | Type | Faction | Price (RP) | Magazine size | Fire rate (RPM) | Accuracy factor | Recoil | Recoil recovery | Kill probability | Fall-off Start(m) | Max range(m) | Projectile Speed(m/s) | Speed modifier(%) | Commonness |
|---|---|---|---|---|---|---|---|---|---|---|---|---|---|---|---|
|
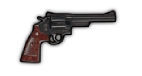
44 Magnum | Double-action revolver, alternate rapid fire mode
(rapid fire mode stats in parenthesis, is actually less accurate) |
Rare | 80 | 6 | 176 (600) | 1.0 | 1.0 | 1.5 | 1.6 | 30.8 | 44 | 110 | 0 | 0.002 (0.23%) |
|
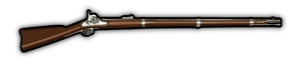
Buckshot Bess Musket | Muzzleloader, optional 3m bayonet
Grants a special outfit while equipped (bayonet stat changes in parenthesis) (has a different outfit if Cavalry Saber is also equipped) |
Secret crate | 600 | 1 | N/A | 0.32 (.3) | 3.0 | 0.2 | 0.7x30 | 35 | 40 | 100 | -11 (-12) | 0 |
|
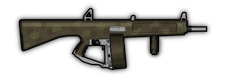
AA12-Frag | Assault Blast Shotgun , full-auto, full magazine reload,
1.8m radius , 8 damage per hit to light vehicles, Cannot damage Tanks & APCs |
Gift Box | 370 | 20 | 200 | 0.9 | 0.35 | 0.85 | Explosive | - | - | 75 | -10 | 0 |
|
Flamethrower | Assault Flamethrower, full-auto, 1.5 radius,
2 damage per hit to light vehicles |
Gift Box | 400 | 100 | 1200 | 1.5 | 0.1 | 1.0 | Explosive | - | - | 140 | -15 | 0 |
|
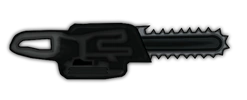
Chainsaw | Chainsaw, mechanically powered melee weapon,
deals 1 damage per hit to light vehicles |
Gift Box | 120 | Unlimited | 857 | 0.95 | 0 | 2.0 | Melee | - | 2 | 8 | -20 | 0 |
|
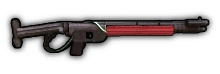
Dragons breath | Dragons breath, Shoots dragons breath rounds,
deals 1 damage per hit to vehicles , 1.2m radius |
Gift Box | 360 | 2 | 286 | 0.68 | 2.0 | 0.9 | 18xExplosive | - | - | 80 | -2 | 0 |
| Blowgun | Pneumatic ranged hunting weapon, shoots poisonous darts,
wounds enemies, suppressed |
Gift Box | 70 | 1 | N/A | 1 | 1 | 0.8 | 1.01 (wound) | 24 | 42 | 60 | -5 | 0 | |
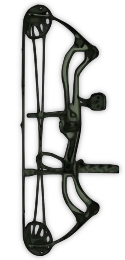
|
Compound bow | Hand-drawn elastic hunting weapon, body-armor piercing,
suppressed, 1.4x zoom, full standing accuracy, optional explosive arrow mode (explosive stats in parenthesis) |
Gift Box | 215 | 1 | N/A | 1 (0.95) | 2 | 0.5 | 1.5 (Explosive) | 8 | 80 (60) | 80 (50) | -10 (-11) | 0 |
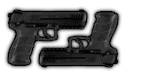
|
L30P-DUALIST | Dual wielded pistols, Gives John Wick skin while equpped | Gift Box | 420 | 15 | 300 | 0.88 | 2 | 2 | 0.4x2 | 33 | 38 | 110 | +10 | 0 |
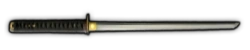
|
Ninjato | Sword with 3m melee range,
can throw shurikens and firecrackers(stun), invisible temporary bullet shield when holding down attack, gives a ninja outfit while equipped with gold knife |
Gift Box | 999 | 3 | 2000 | 1 | 0 | 1 | 3.01 | - | - | 20 | +12 | 0 |

|
Zweihander | Sword with 4m melee range,
invisible temporary bullet shield when holding down attack, gives a knight outfit while worn |
Gift Box | 1000 | - | - | - | - | - | 3.5 | - | - | - | +5 | 0 |
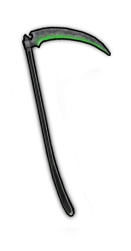
|
Reaper's Scythe | Primary scythe with 3m melee range,
No shield, melee kills while wearing the Reaper Costume summon friendly skeletons during Halloween. |
Gift Box | 222 | - | - | - | - | - | 6.66 | - | - | - | 0 | 0 (limited duration: Halloween Box only) |
|
Defibrilator | Reusable medkit, faster heal animation (~2/3 of the animation time before healing), has a unique stab animation (no extra range) | Gift Box | 100 | - | - | - | - | - | - | - | - | - | +3 | 0 (Found in Community Box 2 and Pumpkin Box only) |
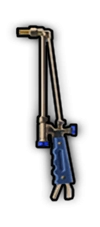
|
Welding torch | Repairs vehicles to 110%, unlimited use. Warning: Explodes on death. Exploded torches are NOT recoverable. Friendly fire does not cause torch explosion |
Gift Box | 100 | 100 | 240 | 1.0 | 0 | 1.0 | - | - | - | 10 | -35 | 0 (Found in Community Box 6 and Pumpkin Box only) |
Secondary special[ | ]
| Image | Name | Type | Faction | Price (RP) | Magazine size | Fire rate (RPM) | Accuracy factor | Recoil | Recoil recovery | Kill probability | Fall-off Start(m) | Max range(m) | Projectile Speed(m/s) | Speed modifier(%) | Commonness |
|---|---|---|---|---|---|---|---|---|---|---|---|---|---|---|---|

|
Medical Dart Gun | Medigun, suppressed, 1.2x zoom, can heal wounded from distance | Gift Box | 180 | 1 | N/A | 1.0 | 2.0 | 0.5 | Healing (1m radius) | - | - | 100 | -5 | 0 |

|
Cavalry Saber | Secondary sword with 3m melee range,
invisible temporary bullet shield when holding down attack |
Gift Box | 333 | - | - | - | - | - | 1? | - | - | - | +12 | 0 |
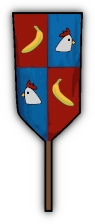 
|
Banner (Chicken / President) | Secondary banner, 2.8m range
No shield, can switch between either banner |
Gift Box | 300 | - | - | - | - | - | 1 | - | - | - | 0 | 0 (limited duration: Halloween Box only) |
|
Banner (I Love RWR / Medic) | Secondary banner, 2.8m range
No shield, can switch between either banner |
Gift Box | 500 | - | - | - | - | - | 1 | - | - | - | 0 | 0 (limited duration: Halloween Box only) |
 
|
Banner (Ice Cream / Pink Panda) | Secondary banner, 2.8m range
No shield, can switch between either banner |
Gift Box | 100 | - | - | - | - | - | 1 | - | - | - | 0 | 0 (limited duration: Halloween Box only) |
 
|
Banner (Voting) | Secondary banner, 2.8m range
No shield, can switch between either banner |
Gift Box | 100 | - | - | - | - | - | 1 | - | - | - | 0 | 0 (limited duration: Halloween Box only) |
 
|
Banner (Smiley / Jack O'Banner) | Secondary banner, 2.8m range
No shield, can switch between either banner |
Gift Box | 100 | - | - | - | - | - | 1 | - | - | - | 0 | 0 (limited duration: Halloween Box only) |
 
|
Banner (Present / Gingerbread) | Secondary banner, 2.8m range
No shield, can switch between either banner |
Gift Box | 100 | - | - | - | - | - | 1 | - | - | - | 0 | 0 (limited duration: Christmas Box only) |
 
|
Banner (Santa / Grinch) | Secondary banner, 2.8m range
No shield, can switch between either banner |
Gift Box | 150 | - | - | - | - | - | 1 | - | - | - | 0 | 0 (limited duration: Christmas Box only) |
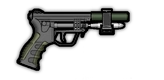
Secondary handguns[ | ]
| Image | Name | Type | Faction | Price (RP) | Magazine size | Fire rate (RPM) | Accuracy factor | Recoil | Recoil recovery | Kill probability | Accuracy falloff (m) | Max range (m) | Bullet Speed(m/s) | Speed modifier(%) | Commonness |
|---|---|---|---|---|---|---|---|---|---|---|---|---|---|---|---|

|
Beretta M9 | Pistol, semi-auto,
optional suppressor (suppressed stats in parenthesis) |
Greenbelts/
Non-unlockable |
3 | 15 | 240 | 0.95 | 0.7 | 0.65 | 0.5 (0.45*) | 35 | 50 (40) | 100 | 0 | 0** |
|
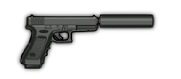
Glock 17 | Pistol, semi-auto,
optional suppressor (suppressed stats in parenthesis) |
Graycollars/
Non-unlockable |
3 | 17 | 300 | 0.95 | 0.8 | 0.70 | 0.5 (0.45*) | 32 | 48 (38) | 100 | 0 | 0** |
|
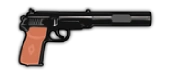
PB | Pistol, semi-auto,
suppressed |
Brownpants/
Non-unlockable |
3 | 8 | 200 | 0.95 | 0.5 | 0.8 | 0.5* | 28.5 | 38 | 95 | 0 | 0** |
|
Beretta 93R | Machine pistol, 3-round burst,
suppressed |
Rare /
Secret crate |
100 | 15 | 857 | 0.95 | 0.25 | 0.7 | 0.5* | 26 | 35 | 100 | 0 | 0.0014 |
|
MK23 SOCOM | Pistol, 2-round burst,
suppressed |
Unlockable | 20 | 12 | 1000 | 0.95 | 0.5 | 1 | 0.4 | 28 | 38 | 100 | 0 | 0 |
|
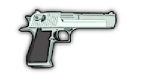
Desert Eagle | Pistol, semi-auto | Unlockable | 10 | 7 | 200 | 1 | 0.5 | 0.8 | 0.7 | 44 | 66 | 110 | 0 | 0 |
|
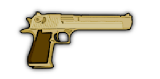
Desert Eagle Gold | Pistol, semi-auto | Secret crate / | 300 | 8 | 200 | 1 | 0.5 | 0.8 | 0.9 | 48.3 | 71.3 | 115 | 0 | 0 |
|
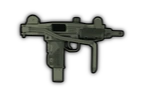
Mini UZI | Machine pistol, full-auto | Greenbelts/
Non-unlockable |
3 | 20 | 681 | 0.87 | 0.30 | 1.2 | 0.45 | 32 | 42 | 100 | 0 | 0** |
|
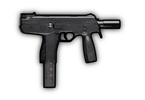
Steyr TMP | Machine pistol, full-auto | Graycollars/
Non-unlockable |
3 | 30 | 666 | 0.90 | 0..28 | 1.0 | 0.5 | 27 | 39 | 100 | 0 | 0** |
|
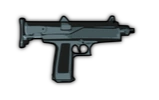
AEK-919k | Machine pistol, full-auto | Brownpants/
Non-unlockable |
3 | 30 | 681 | 0.89 | 0.33 | 1.1 | 0.46 | 28 | 41 | 100 | 0 | 0** |
|
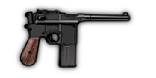
M712 Schnellfeuer | Machine pistol, full-auto | Rare | 220 | 20 | 909 | 0.95 | 0.6 | 1.6 | 0.8 | 22 | 36 | 100 | 0 | 0.0015 |
|
MP7 | Machine pistol, full-auto,
high-velocity |
Rare / | 290 | 40 | 759 | 0.92 | 0.7 | 2.0 | 0.55 | 27.5 | 49.5 | 110 | 0 | 0.0010 |
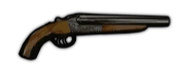
|
Sawn-Off | Short double-barreled shotgun,
dual triggers |
Very rare / | 210 | 2 | 285 | 0.78 | 2.0 | 1.5 | 0.59x10 | 21.5 | 30.1 | 86 | 0 | 0.0005 |
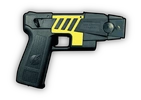
|
Taser | Nonlethal, wounds enemies | Gift Box | 80 | 1 | n/a | 0.95 | 0.8 | 0.65 | 5.01 (wound) | 25 | 26 | 100 | +5 | 0 |
|
Squall | Automatic weapon,
very fast firing, fire while crouched |
Gift Box | 700 | 50 | 1875 | 0.55 | 1.7 | 0.7 | 0.58 | 28 | 55 | 72 | -45 | 0 |
|
MAC-10 | Machine pistol, full-auto,
optional suppressor (suppressor stats in parenthesis) |
Gift Box | 210 | 50 | 923 | 0.89 | 0.25 | 1.5 | 0.45 | 28.4 (25) | 45.2 (38) | 105 (100) | 0 | 0 |
|
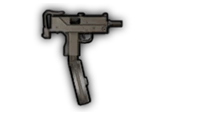
MGV-176 | Submachine gun, full-auto | Gift Box | 270 | 177 | 1200 | 0.55 | 0.61 | 3.0 | 0.42 | 16.15 | 33.25 | 95 | 0 | 0 |
Notes:
- * Keep in mind that if the area is not under alert, the suppressed weapon's probability kill is 1.0, i.e. 100%
- ** The AIs can't spawn with those weapons, they are only available for the human players!
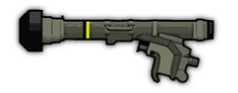
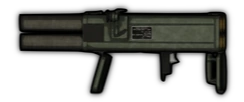
Secondary Anti-tank weapons/Anti-personnel mines[ | ]
| Image | Name | Faction | Price (RP) | Damage | Blast radius (m) | Velocity (m/s) | Description |
|---|---|---|---|---|---|---|---|

|
M72 LAW | Greenbelts/
Unlockable |
4 | 330 | 4.0 | 50 | Average/all-rounder stock rocket launcher, -16% movement speed while carrying in hands. |
|
M2 Carl Gustav | Graycollars/
Unlockable |
4 | 360 | 3.5 | 60 | Highest damage and fastest projectile among stock rocket launchers, but smallest blast area, 1.1x zoom, |
|
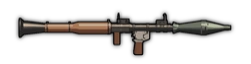
RPG-7 | Brownpants/
Unlockable |
3 | 300 | 5.0 | 40 | Largest blast area but the lowest damage and slowest projectile among stock rocket launchers, -18% movement speed while carrying in hands. |

|
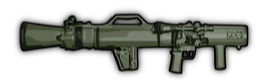
SMAW | Unlockable | 7 | 400 | 3.5 | 75 | Surpasses all stock rocket launchers, except in blast radius, 1.5x zoom, |
|
Javelin | Uncommon | 10 | 450 | 5.0 | 100 | Largest splash area and high-damage with the fastest projectile but travels slowest because it flies at an arc.
Not among the stock weapons but can be dropped by the dead AI soldiers,
|
|
M202 flash | Rare/ | 30 | 220 x4 | 4.5 | 60 | Four tubed rocket launcher, fires all rounds at once.
Not among the stock weapons but can be dropped by the dead Elite soldiers (Officers). |
|
Claymore | Non faction specific | 5 | 10 | 6.0 | N/A | Once planted, it detonates only on contact with an enemy soldier/vehicle.
Can be disarmed by knifing it (V by default) and it will disappear. Despawns 4 minutes after deployed. |
|
Tracer | Gift Box | 80 | 1201 | 8.0 | N/A | Fires a tracer dart, launches a single missile after 6 seconds at landing spot. Does not reduce/increase the movement speed while carrying in hands.
Available in Community Box 1 and Lottery Tickets! |

|
M320 | Rare/ Gift Box | 320 | 50 | 4.4 | 100 | Secondary grenade launcher, reloadable.
-3% movement speed while carrying in hands Available in Community Box 5 and Lottery Tickets. |
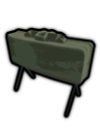
Secondary support equipment[ | ]
| Image | Name | Price (RP) | Health Points | Description |
|---|---|---|---|---|
|
Golden Knife | 1000 | N/A | Primary attack smash the ground, launching enemies and vehicles within a 6m radius far away.
Melee works just like regular knife with 2m max range |

|
Cover deploy | 10 | 495 | Provides cover for soldiers. It is also hard to be pushed from light vehicles. -40% movement speed while carrying in hands. |
|
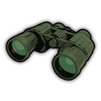
Binoculars | 1 | N/A | Available in the Armory. Increases the vision range by 65% while used and standing still, zoom 1.65x. Does not reduce/increase the movement speed while carrying in hands. |
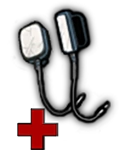
|
Medikit | 1 | N/A | When equipped, keep LMB pressed for a 3 seconds near the wounded soldier and he will be healed. +6% movement speed while carrying in hands. |
|
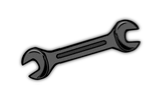
Small wrench | 3 | 1 | A single use wrench can repair 100 damage units on vehicles, structures and deployables. Player can hold max 4 at a time. +6% movement speed while carrying in hands. |

|
Large wrench | 3 | 1 | A single use wrench can repair 150 damage units on vehicles, structures and deployables. Player can hold max 4 at a time. +3% movement speed while carrying in hands. |
|
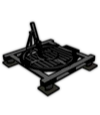
Repair crane deploy | 400 | Deploys a crane that can quickly repairs damaged vehicles. Over-repairs vehicles to 110%!
Repair function doesn't work in quick match! | |
|
Vest Repair Kit | 10 | N/A | Used for repairing damaged body armor. -5% movement speed while carrying in hands. |
|
Squad Equipment Kit | 200 | N/A | Equips every bots in the player squad with T2 Vests.
|
|
Chicken carrier | 200 | N/A | Spawns 5 friendly chickens upon use. These chickens function as friendly ai, but cannot attack or join player squads.
They do contribute to capturing points, however killing friendly chickens has the same penalties as killing friendly ai. -20% movement speed while carrying in hands. Found in Community box 5 and Lottery tickets! |

|
GPS laptop | 50 | N/A | When used, temporarily reveals the locations of enemy radar towers, jammers, prisons, AA emplacement, radar tanks, commss and cargo trucks.
-40% movement speed while carrying in hands. |

|
Riot shield | 3 | 1 | Blocks incoming bullets. If the shield's carrier being hit by an explosive, he will get stunned for 3 seconds and the shield will be destroyed. -10% movement speed while running with it in hands. |

|
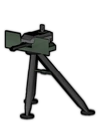
Stationary MG | 70 | 80 | Accuracy factor 0.9, recoil 0.8, recoil recovery 0.8, kill chance 0.5, no reloading required, rotation angle: 90°. -40% movement speed while carrying in hands. |
|
|
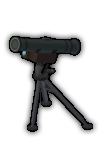
Stationary Minigun | 250 | 80 | Accuracy factor 1.0, recoil 0.17, recoil recovery 1.1, kill chance 0.4, no reloading required, rotation angle: 90°. -40% movement speed while carrying in hands. |
|
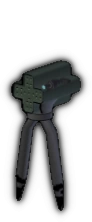
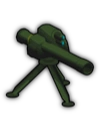
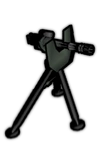
Stationary TOW | 250 | 80 | 4 seconds reloading time, rotation angle: 120°. 3.5m blast radius, zoom 1.3x. -40% movement speed while carrying in hands. |
|
Stationary Grenade Launcher | 200 | Accuracy factor 0.95, recoil 4.0, recoil recovery 1.0, no reloading required. -40% movement speed while carrying in hands. | |
|
Hornet | 350 | Accuracy factor 1, recoil 1.2, recoil recovery 0.6, zoom 1.65x. -40% movement speed while carrying in hands. | |
|
Stationary Mortar | 300 | 80 | Rotation angle: 300°, 1.5x zoom. -50% movement speed while carrying in hands. |
|
|
Tank trap deploy | 5 | 800 | Blocks vehicles paths. -20% movement speed while carrying in hands. |
|
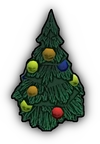
Xmas Tree | 30 | N/A | -40% movement speed while carying.
Used to deploy a Christmas Tree, which can be destroyed and makes for poor cover. Contains an elevated sniping position. |

Throwables[ | ]
| Image | Name | Price (RP) | Damage | Effective radius | Description |
|---|---|---|---|---|---|

|
Hand grenade | 2 | 101 | 6.0 | Detonates after 3 seconds. |
|
Impact grenade | 2 | 240 | 3.0 | Detonates immediately on contact. Slightly more throw range than hand grenade |
|
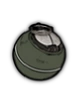
Stun grenade | 2 | - | 10.0 | Detonates after 3 seconds. Does no damage to vehicles but stuns infantry. |
|
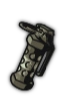
C4 | 20 | 2400 | 10.0 | Detonated by either clicking it or using the Squad command modifier button (Windows key by default) + grenade key (G by default).
Despawns 45 seconds after use. |
|
AT mine | 5 | 450 | 5.0 | Detonates in contact with any vehicle. Can be disarmed by knifing it (V by default) and it will remain on the ground. |

|
Flare | 150 | N/A | N/A | Player paratrooper spawn point. Active only if there are no enemies nearby! |

|
Mustela Drop | 800 | N/A | N/A | Deploys the Mustela tank. Available in Community Boxes only! |

|
Banana Car Drop | 100 | N/A | N/A | Deploys the Bananza. Available in Community Boxes only! |

|
Gun truck Drop | 700 | N/A | N/A | Deploys the Gun truck. Available in Community Boxes only! |

|
AAV-G17/A1 Drop | 700 | N/A | N/A | Deploys the AAV-G17/A1 tank. Available in Community Boxes only! |

|
FST ACAV Drop | 600 | N/A | N/A | Deploys the Vulcan ACAV tank. Available in Community Boxes only! |

|
ZJX-19/XE Drop | 510 | N/A | N/A | Deploys the ZJX-19/XE repair tank. Available in Community Boxes only! |

|
Stim Pack | 30 | N/A | 2.0 | Short throwing distance, click on the stimpack on the ground after throwing to activate. Can be disarmed in the same manner as C4.
Activated stim packs heal same-faction players that are downed and crawl onto them. Available in Community Boxes only! |
|
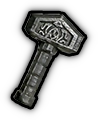
Doom's Hammer | 50 | 2000 | 5.0 | Powerful throwable. Same throw range as impact grenade. Single Use, equipped in throwable slot |

|
Shuriken | 2 | 3.01 | - | Ninja stars, cannot damage vehicles. Single Use, equipped in throwable slot |
|
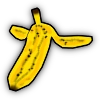
Banana peel | 1 | - | 2.0 | Toss a banana peel to play a harmless slapstick joke on your fellow friends. Warning: not for use in war! |

|
Ice cream | 5 | - | 2.0 | Even in times of war, its never a bad time for ice cream. |
|
EMP grenade | 5 | - | 0.15 | On impact, forces all occupants out of vehicle. Locks vehicle for about 5 seconds. |
Armors/Camouflage suits[ | ]
| Image | Name | Price (RP) | Shots to destroy | Description |
|---|---|---|---|---|
|
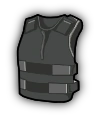
Vest Type-I | 20 | 2 | Available in the Armory. First shot only deals damage to vest, second shot destroys vest and leaves you wounded. Getting knifed or hit by a wound projectile will go through the vest and kill/wound the player/AI wearing it with the vest unharmed. Does not reduce/increase the detectability while worn. -10% movement speed while worn. Vest speed modifier remains constant regardless of vest's damage condition. Available for the human players only! |
|
Vest Type-II | 40 | 3 | Available in the Armory or by knifing/running over an enemy. Provides no resistance to stun/melee/wound projectiles. Comes in 3 stages — 100% - 50% - 25%
-5% movement speed while worn. Movement speed is not affected by the vest's damage condition. |
|
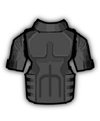
Vest Type-III | 150 | 5 | Can be obtained by running over enemy Elite Soldiers (Officers), Combat Medics, Rangers or may be found in the secret crates on some maps.
Vest comes in 5 stages — 100% - 80% - 60% - 40% - 20%. Getting hit by a wound projectile will go through the vest and wound the player/AI wearing it with the vest unharmed.
|
|
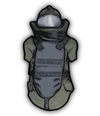
EOD armor | 80 | 3 | Unlockable in Vanilla campaign & Invasion via briefcases/delivering cargo trucks. Also worn by (EOD) Officers. Very weak against bullets compared to Vest Type-II but absorbs much more damage caused by explosives without being stunned. Carriers are completely invulnerable against wounding projectiles (taser and blowgun) and stun explosives until it drops to 40% durability. Melee attacks only deal 1 layer of damage, until the vest is at 40% durability
When equipped by the AI, has two extra layers (55% and 50%). These two layers are identical to the 60% layer. |
|
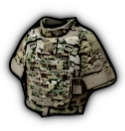
Camouflaged Vest | 150 | 5 | A vest that reduces the detectability while worn. Can be obtained from secret crates on some maps and community boxes. In terms of protection the vest has 5 stages, same as Vest III, but its state is labelled differently -— 100% - 80% - 50% - 20% - Destroyed. Getting hit by a wound projectile will go through the vest and wound the player wearing it with the vest unharmed.
Available for the human players only! |
|
Black Ops Vest | 40 | 2 | Unlockable in Vanilla campaign & Invasion via laptops.
Getting hit by a wound projectile will go through the vest and wound the player wearing it with the vest unharmed.
|
|
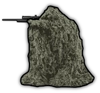
Camo suit | 20 | N/A | A suit that does not provide any protection. The carrier is harder to be detected by the AIs. Unlike Black Ops Vest, ghillie suit has a permanent -20% detection range and +4% movement speed while worn. |
 |
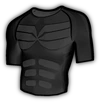
Exo Suit | 100 | 2 | A suit that increases movement speed, and has provides some bullet resistance, and provides a large amount of melee resistance.
Available for the human players only! |
|
Clown suit | 200 | N/A | A suit that does not provide any protection besides looking clownish and boosting slightly the movement speed. +5% movement speed while worn. |
| File:Panda costume panda.png | Clown suit | 200 | N/A | A suit that does not idk speed. +5% movement speed while worn. |

|
Santa suit | 200 | N/A | A suit that does not provide any protection besides looking jolly and merry. Can be found in some of the secret crates on some maps |

|
Werewolf suit | 350 | N/A | A suit that provides a small bullet resistance and gives you a speed boost while looking beastly. Carriers are completely invulnerable against stun explosions. |

|
Wearable Underpants | 1 | N/A | For those that take going commando a bit too seriously. Does not provide any protection while looking hot and sexy. Can be obtained from Community boxes only! |
|
Lizard Mutagen | 666 | N/A | A suit that provides bullet resistance while looking extraterrestrial and giving a speed boost. -5% detection range. The carrier is also completely immune to stun explosions and melee weapons. -15% lethal hit probability and +10% movement speed while worn. |

|
Banana suit | 8 | N/A | A suit that provides bullet resistance while looking like a snack. +20% enemy detection range. -15% lethal hit probability and -10% movement speed while worn. |

|
Psycho Butcher | 280 | N/A | Become your enemies worst nightmare while resisting bullets. +15% enemy detection range. -25% lethal hit probability. |

|
Costume, Reaper | 222 | 3 | Available in Pumpkin Boxes only!
Functions as a T2 Vest with 3 stages — undamaged, damaged, unchained Has the following stats (undamaged/damaged/unchained):
During Halloween event, the stats for the unchained level increase to -42% lethal hit probability, +30% visibility, and -75% night visibility (net 45% less visible at night) |
|
Vampire Wings | 199 | 2 | Available in Pumpkin Boxes only!
In both forms: flashbangs are lethal
|
|
Costume, Chicken | 100 | 2 | Available in Pumpkin Boxes only!
Functions as a banana suit. Has the following stats:
|
Others[ | ]
| Image | Name | Damage | Effective radius | Description |
|---|---|---|---|---|

|
Naval mine | 3000 | 8.0 | Available at Map 9 (so far). Detonates in contact with Patrol Ships only. |
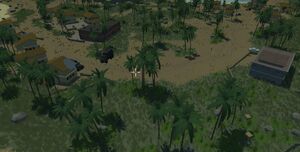
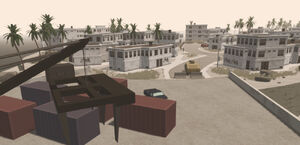
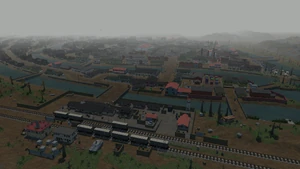
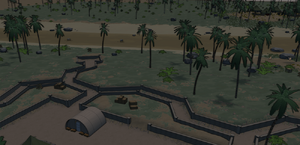
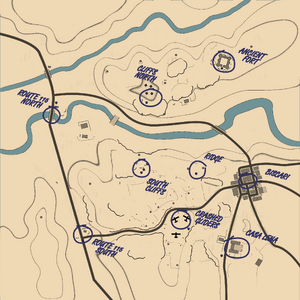
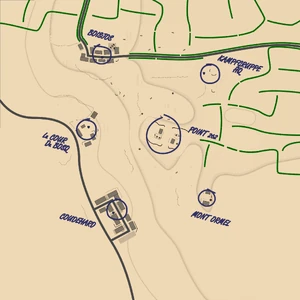
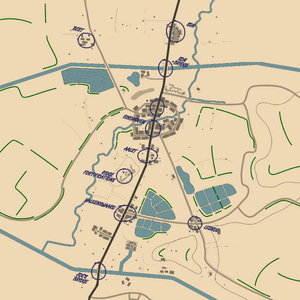
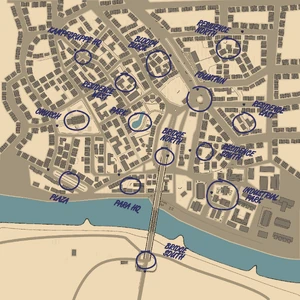
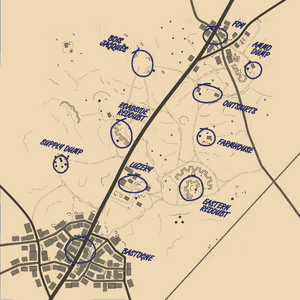
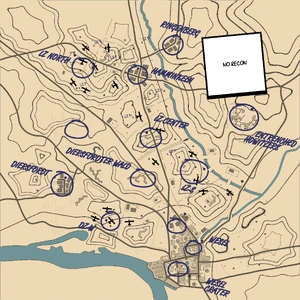
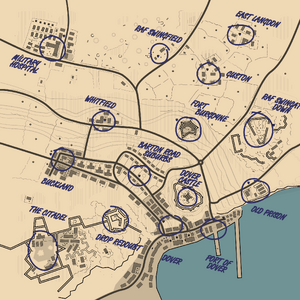
Maps[ | ]
The digital land the soldiers run on is called the Map. Click a picture below to get an overview of that map.
Vanilla game[ | ]
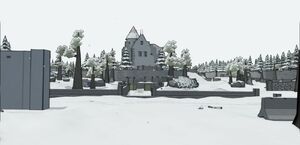
 Moorland Trenches (map1) |
Moorland Apocalypse (map1_2) |
 Keepsake Bay (map2) |
 Old Fort Creek (map3) |
 Fridge Valley (map4) |
 Bootleg Islands (map5) |
 Rattlesnake Crescent (map6) |
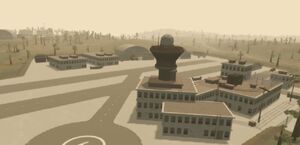
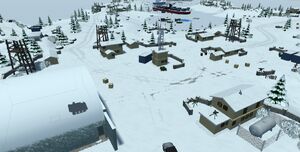
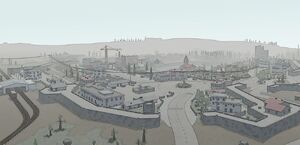
 Power Junction (map7) |
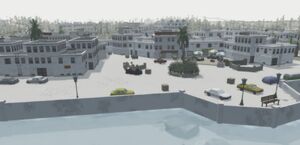
 Vigil Island (map8) |
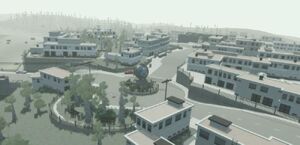
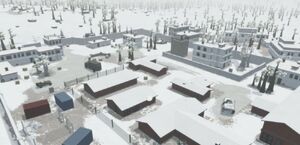
 Tropical Blizzard (map8_2) |
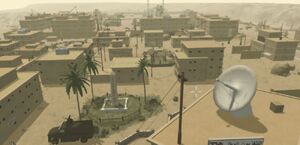
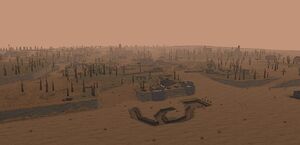
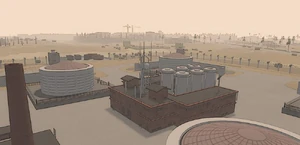 Black Gold Estuary (map9) |
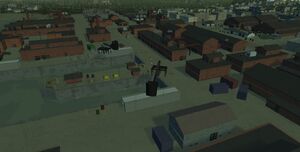
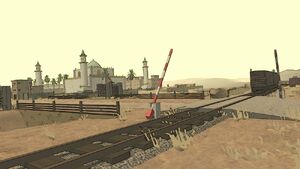 Railroad Gap (map10) |
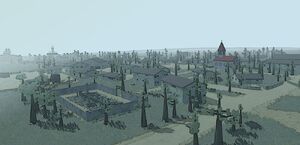 Copehill Down (map11) |
 Frozen Canyon (map12) |
 Iron Enclave (map13) |
| Dry Enclave (map13_2) |
 Misty Heights (map14) |
 Green Coast (map16) |
 Gotcha Island (map17) |
 Islet of Eflen (pvp1) |
 Warsalt Legacy (map18) |
 Swan River (map19) |
RWR: PACIFIC[ | ]
 Guadalcanal (island1) |
 Russell Islands (island2) |
 Bougainville Island (island3) |
 Tarawa (island4) |
 Saipan (island5) |
 Iwo Jima (island6) |
 Operation Downfall (island7) |
 Peleliu Airfield (island8) |
RWR: EDELWEISS[ | ]
 Sicily (edelweiss1) |
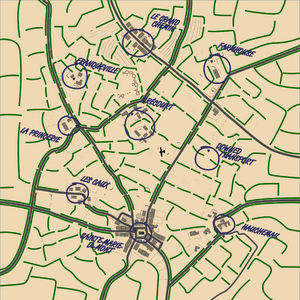 Sainte-Marie-du-Mont (edelweiss2) |
 Hill 262 (edelweiss3) |
 Hell's Highway (edelweiss4) |
 Arnhem (edelweiss5) |
 Bastogne (edelweiss6) |
 Operation Varsity (edelweiss7) |
 Operation Sealion (edelweiss8) |
Radio Calls[ | ]
Click through to the full article to see a list of radio callsRadio calls are powerful game elements that can turn the tide of a battle. They have to be used wisely as they can require a significant amount of resource points and can also provide a lot of collateral damage if not timed properly.
Press and hold the radio calls button (H by default) to bring up your radio calls menu. Select a call by clicking on it or by pressing the number right next to the call symbol. Whatever you selected will then be dropped approximately where you had your crosshairs when you pressed the radio calls button.
Keep in mind that every radio call has a delay thus doesn't happen instantly.
Some maps has an anti-air emplacement that prevents the player from calling in paratroopers, airdrops or close air support, allowing only mortar strikes and artillery. The structure has map-wide range and needs to be destroyed in order to unlock the rest of the radio calls. The emplacement will then remain in its destroyed state indefinitely.
Enemy bases may also have a radio jammer that prevents the player and friendly AIs from using the radio. Unlike the anti-air, the jammer only affects the base itself, but is much more devastating since it completely strips the player off their radio ability.
You have to be at least Corporal (1000 XP) to get a radio device (will be added automatically to your HUD).
 Radio device not available (too low rank) |
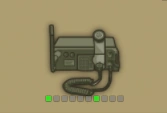 Radio device available (at least Corporal rank) |
Veterans Pack DLC[ | ]
Players with the Veterans Pack DLC will have exclusive access to the light anti-armor VFS Call, though any players can enter the VFS afterwards, regardless of whether they own the DLC.
DLC owners can also toggle on/off a Skin Pack option for their vehicles (applies to Humvee, Buggy, Main Battle Tank), applying a unique map-dependent camo pattern/decals to vehicles that prevents non-DLC owners from entering them.
Vehicles[ | ]
Vehicles will spawn in the same place every time, except special vehicles which spawns in one of several random locations (to avoid predictable matches).
Destroyed vehicles will respawn (reappear undamaged) in their original location (except some special vehicles, which gets a new random location).
You can hijack most vehicles (as some are unhijackable such as the Legion) by entering at the driver's door. You will drag him out! Don't forget to stab him, before he stabs you!
Some vehicles allow passengers to shoot and use throwables from their seats, which allows various weapons to be used on otherwise unarmed vehicles.
Vehicles can only be damaged by explosives: mines, grenades, bazookas.
Special vehicles[ | ]
Special vehicles either provide utilities to their owning factions or are targets for destruction for various rewards. All special vehicles are unarmed.
| Image | Name | Description | Speed | Acceleration | Health Points |
|---|---|---|---|---|---|
|
Spawn truck | A mobile spawn point for the humans players from the same faction. Usually paired with an Armory Truck.
Total 10 seats - 1 driver, 9 passengers. Cannot be driven independently by the AIs on their own will, except when a real human player has given a command to the driver[1]. Active only if there are no enemies nearby! |
20 | 6 | 600 |
|
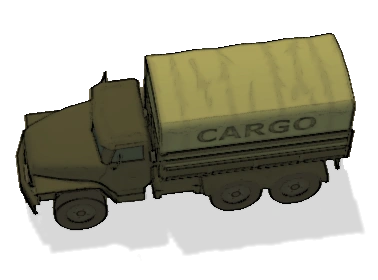
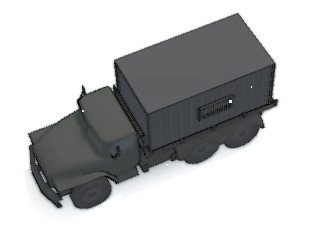
Cargo truck | Appears as a special objective in some maps. Steal it and drive it to some of your stationary faction's Armories for a RP reward and an extra weapons or equipment unlock.
|
20 | 6 | 480 |
|
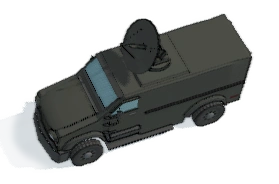
Comms truck | A mobile Radar Tower that provides intel on the map and prevents the enemy from using calls within a 100m radius. When destroyed the AI on the team will be less effective for three minutes.
|
20 | 6 | 600 |
|
Cargo vehicle | Appears as a challenge objective on some maps. Find it and drive it to some of your stationary faction's Armories for a RP reward. Required for the Tracker challenge.
Total 2 seats - 1 driver, 1 passenger |
20 | 8 | 480 |
|
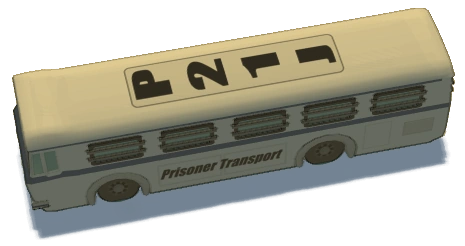
Prisoner transport | Appears as a special objective in some maps. Destroy it for a RP reward and to release 20 prisoners as extra units for your faction. The Bus also spawns enemy units near it when active, thus its destruction is highly important to prevent bases from being recaptured. The engine is broken, therefore the bus moves very slowly.
|
2 | 5 | 2400 |
|
Armory Truck | A mobile Armory with a full availability as in stationary Armory. Accessible from the rear. The Armory Truck is a vital asset that ensures frontline troops are always well-equipped and reduces the need to retreat to the nearest base with an Armory. Intentional destruction of the Armory Truck is strictly prohibited!
Cannot be driven independently by the AIs on their own will, except when a real human player has given a command to the driver[2]. |
16 | 5 | 480 |
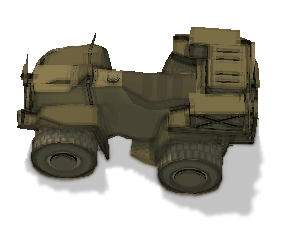 |
Supply Quad | Small mobile armory with a limited availability. Accessible from the rear. Provides low passengers protection.
|
24 | 8.5 | 120 |
Generic combat vehicles[ | ]
Each faction has equal access to these vehicles.
| Image | Name | Description | Armament | Speed | Acceleration | Health Points |
|---|---|---|---|---|---|---|
 |
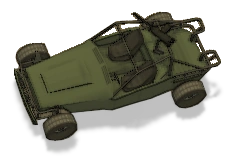
Quad | Low passenger protection. Passenger sits from the back. Total 2 seats - 1 driver, 1 passenger |
None. | 28 | 9.7 | 120 |
 |
Buggy | Low passenger protection. MG gunner enters from the back. Total 3 seats - 1 driver, 1 gunner, 1 passenger |
1 MG: 600 RPM. | 28 | 7.7 | 240 |
 |
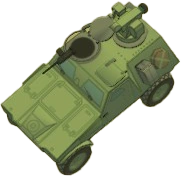
Patriot | Moderate protection, only the driver and the passenger next to them are fully protected. MG gunner enters from the back.
|
1 MG: 500 RPM. | 20 | 6.7 | 330 |
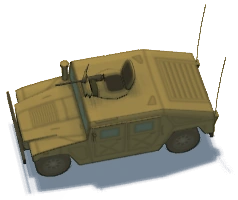 |
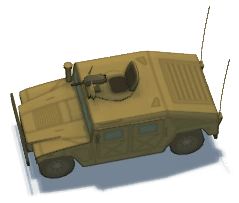
Humvee | Light transport vehicle armed with an MG. Fully protects driver and passengers from bullets. MG gunner enters from the back.
|
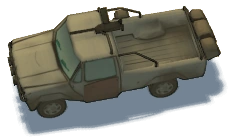
1 MG: 500 RPM. | 22 | 6.6 | 420 |
 |
Humvee GL | Light transport vehicle armed with an auto grenade launcher. Fully protects both driver and passengers from bullets. GL gunner enters from the back.
|
1 Automatic GL: 60 RPM. | 22 | 6.6 | 420 |
 |
VFS | Lightly armored anti-tank vehicle mounted with a TOW and MG. The anti-tank TOW is slightly elevated and can shoot over some cover. Suitable for general fire-support purposes.
|
1 TOW:
1 MG: 600 RPM |
23 | 7.0 | 420 |
 |
Vulcan tank* | Minigun mounted tank loaded with explosive ammunition. Armed with a fast shooting rotary cannon. Not very effective against vehicles but very deadly to infantry.
|
1 Vulcan Minigun:
|
10 | 15 | 840 |
 |
Radar tank* | Similar to Comms Truck but it is equipped with a fast shooting dual-cannon. Not very effective against vehicles but very deadly to infantry.
(Player-only in PVP and AI-only on Map 16, Map 1_2 and Reverse Map 6. )
|
1 Dual-cannon:
Has a large Radio jamming range around it. Watch out. |
8 | 12 | 1400 |
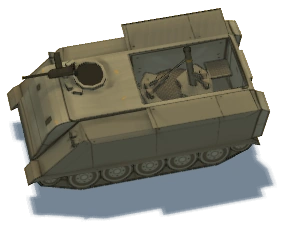 |
Mortar tank* | A mortar-equipped tank that provides moderate protection for soldiers, only the driver is fully protected. Excellent for fire-support purposes and not advised to go head-to-head against enemy armor.
|
1 Mortar:
|
9 | 14 | 800 |
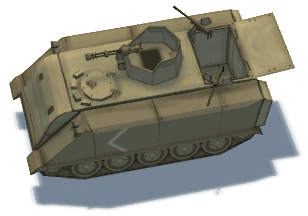 |
FST ACAV* | A minigun-equipped tank that provides moderate protection for its crew, alongside 2 limited-angle MGs on the side for flank protection. Deadly against infantry but ineffective against armor.
Total 4 seats - 1 driver, 1 main gunner, 2 side gunners |
1 Minigun turret: 1500 RPM.
2 MGs: 521 RPM. |
10 | 15 | 840 |
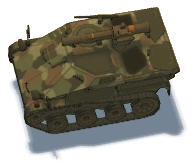 |
Mustela* | A modern tankette, armed with a heavy TOW and MG3. Gives low protection to gunners but high protection to driver. Suitable for general fire-support purposes thanks to its versatility.
|
1 TOW:
1 MG3: 750 RPM. |
15 | 20 | 800 |
 |
Mustela 20mm* | A modern tankette armed with a 20mm auto-cannon. Sadly the only delivery of this vehicle has been lost.
|
1 Auto-cannon:
|
14 | 18 | 800 |
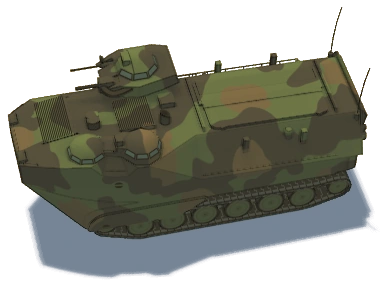 |
AAV-G17/A1* | An amphibious landing craft heavily armored and armed with a twin-linked turret containing a machine gun and auto grenade launcher. Designed for beach landings and general armored warfare. Effective against infantry but doesn't perform too well against armor, though the AAV can tank some hits thanks to its high health.
|
1 Auto GL:
1 MG: 500 RPM. |
12 | 15 | 1,100 |
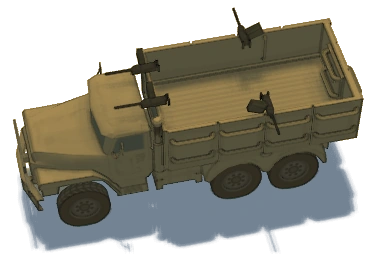 |
Gun truck | A heavily-modified convoy escort Troop Transport Truck mounted with 4 MGs. Tremendous crowd-control capability.
|
4 MG: 600 RPM | 20 | 6 | 500 |
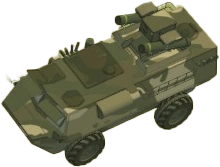 |
NOXE Ghost APC* | A heavily armed APC with a dual-missile system. Dual-missile can shoot over walls (similar to the Hornet) with medium arc, suitable for long-range firing support. Effective against both infantry and armor.
|
1 Dual-missile Launcher:
|
20 | 8 | 700 |
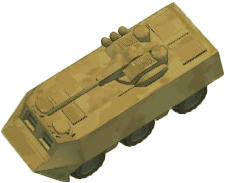 |
FT-CROC* | An APC equipped with a flamethrower and MG. Both turrets are controlled by 1 gunner. The flamethrower has limited magazine capacity. Unparalleled crowd-control capability but nigh-useless against armor.
|
1 Flamethrower:
1 MG: 300 RPM. |
22 | 8 | 640 |
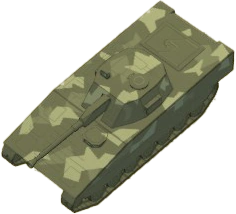 |
SEV-90* | A battle tank armed with an auto 40mm airburst grenade cannon. Main cannon has restricted range but can hit targets hiding behind cover thanks to its airburst capability. Excellent against infantry but ineffective against armor.
|
1 Auto Airburst GL:
|
14 | 15 | 800 |
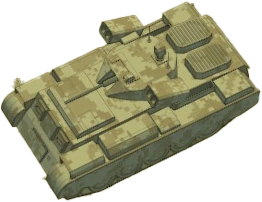 |
M528* | An armored assault vehicle equipped with a medium caliber auto-cannon and a dual anti-personnel cluster bomb launcher (similar to AP Javelin). Both turrets are controlled by 1 gunner. Extremely effective against infantry but weak against armor.
|
1 Auto-cannon:
2 Cluster Missile Launcher:
|
10 | 15 | 840 |
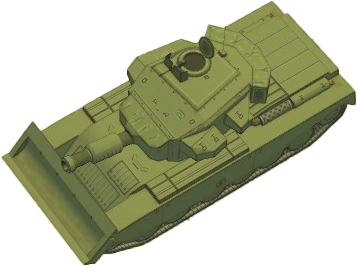 |
Legion* | Possibly the most powerful vehicle available to players, Legion is a heavy battle tank armed with a 165mm mortar cannon and a mounted MG for anti-infantry purposes. The main cannon is extremely devastating against both infantry and armor alike due to its brutal damage and massive blast radius, alongside the ability to shoot over walls/covers. Capable of shoving other vehicles out of the way.
|
1 Mortar Cannon:
1 MG: 400 RPM. |
8 | 12 | 1400 |
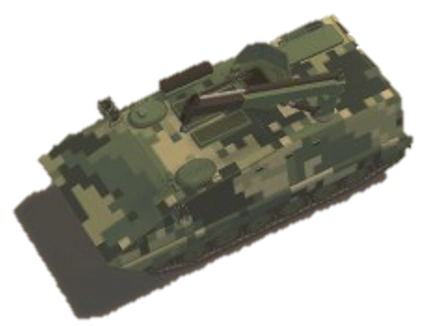 |
ZJX-19/XE ASV* | A repair vehicle bought from the Redshirts armed with a repair crane and an MG for self-defense. Repair crane functions similarly to wrenches, allowing for the repairing vehicles anywhere on the battlefield.
|
1 MG: 600 RPM. | 12 | 16 | 860 |
 |
Rubber boat | It's a boat! Passengers can shoot from their seats. Driver sits from the back left. Destroyed when driven on to land.
|
None | 50 | 10 | 75 |
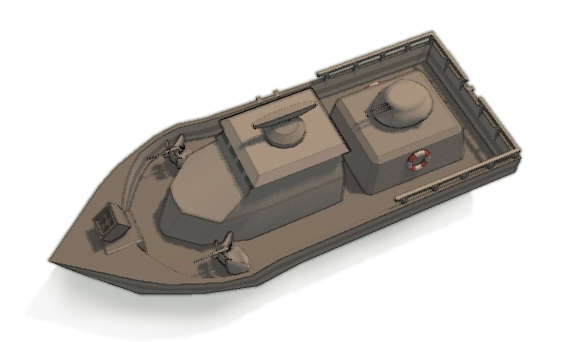 |
Patrol ship | An attack boat with heavy armament almost on par with the Darkcat Supertank. Passengers can shoot from their seats. Destroyed when driven onto land.
|
1 Quad-rocket Launcher:
1 Dual-cannon:
2 MG: 500 RPM. |
50 | 7 | 1600 |
*Armored: weapons that deal less than 17 explosive damage will not harm.
Civilian vehicles[ | ]
These are civilian vehicles the soldiers can access. Seems not everyone locked their doors.
| Image | Name | Description | Speed | Acceleration | Health Points |
|---|---|---|---|---|---|
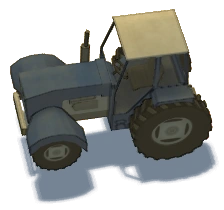
|
Tractor | A vehicle that was meant for tactical farming operations. However the players' idea of farming was quite different. | 22 | 7 | 450 |
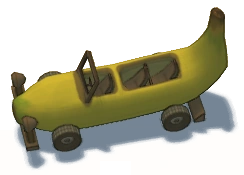
|
Bananza | Not meant for combat, this promotional vehicle was made to sell bananas. Sadly, no one has emptied the banana peels out of it. Its controls are a bit slippery.
On destruction spawns anywhere from 6 to 13 banana peels, so watch your step. |
28 | 7.7 | 240 |
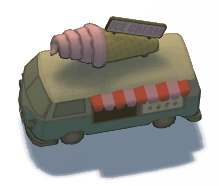
|
Ice cream van | An Ice cream truck, apparently the person running it is also running a black market out of the back. Buy his tickets for 1,500 RP to get a random rare reward. So this is where the elites get their guns.
Melts on destruction |
0 | 0 | 300 |
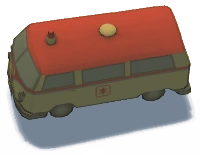
|
Ambulance | An abandoned ambulance. Apparently it's out of fuel so it can't be driven, but fortunately the horn still works. Medikits are available for purchase at the back of the van. | 0 | 0 | 300 |
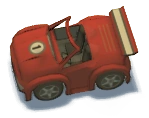
|
Racing car | Found on an abandoned racing track. These cars go fast around a track. Not meant for combat. | Varries | Varries | 100 |
Faction unique vehicles[ | ]
Each faction has their own slightly different version of jeep, truck, APC, tank.
| Image | Class | Name | Description | Armament | Speed | Acceleration | Health Points | Faction |
|---|---|---|---|---|---|---|---|---|
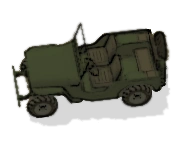
|
Light transport vehicle | Jeep | The fastest land vehicle for the faction but offers no protection. The passengers can shoot from their seats in the angle they are facing.
|
None | 23 | 6.5 | 240 | Greenbelts |
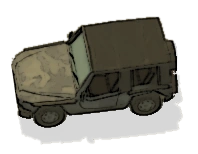
|
Light transport vehicle | Pigeon P5 | The fastest land vehicle for the faction but offers no protection. The passengers can shoot from their seats in the angle they are facing. Strongest light transport vehicle out of the three.
|
None | 21 | 7.2 | 300 | Greycollars |
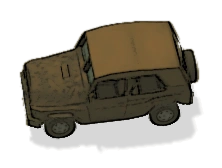
|
Light transport vehicle | Urbal UAS | The fastest land vehicle for the faction but offers no protection. The passengers can shoot from their seats in the angle they are facing.
|
None | 24 | 8 | 240 | Brownpants |
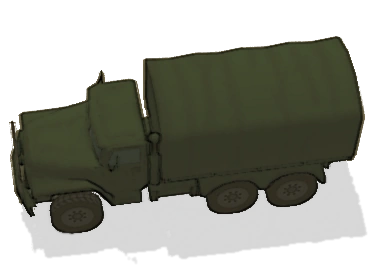
|
Troop transport truck | Transport truck | Transport truck, unarmored truck for troop transport.
|
None | 20 | 6 | 480 | Greenbelts |
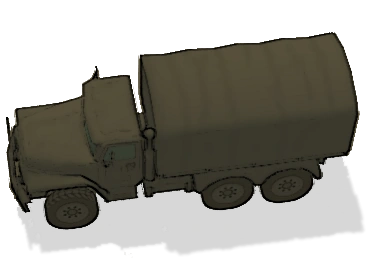
|
Troop transport truck | Transport truck | Transport truck, unarmored truck for troop transport.
|
None | 20 | 6 | 480 | Greycollars |
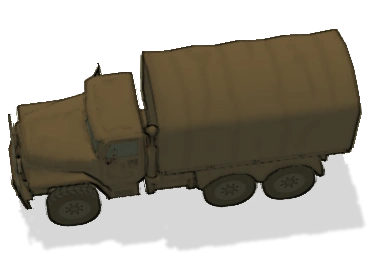
|
Troop transport truck | Transport truck | Transport truck, unarmored truck for troop transport.
|
None | 20 | 6 | 480 | Brownpants |
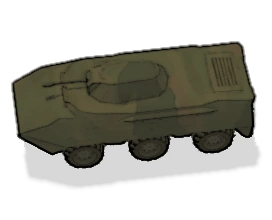
|
APC | SIK-AP* | Armored Personnel Carrier capable of carrying infantry and armed with an auto-cannon.
Generally the most powerful faction APC (highest damage and health). Total 8 seats - 1 driver, 1 gunner, 6 passengers |
1 Auto-cannon:
|
20 | 6.7 | 720 | Greenbelts |
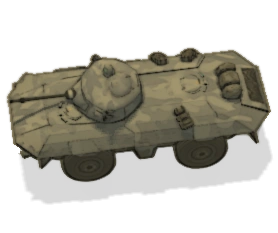
|
APC | GT-C* | Armored Personnel Carrier capable of carrying infantry and armed with an auto-cannon.
Generally the weakest faction APC (lowest damage and health). Total 6 seats - 1 driver, 1 gunner, 4 passengers |
1 Auto-cannon:
|
23 | 7.3 | 570 | Greycollars |
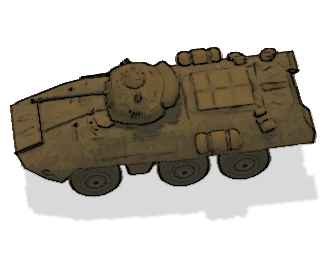
|
APC | BTX* | Armored Personnel Carrier capable of carrying infantry and armed with an auto-cannon.
|
1 Auto-cannon:
+) 36 dmg, 1.5m blast radius. +) 150 RPM, 90 DPS. |
21 | 6.4 | 660 | Brownpants |
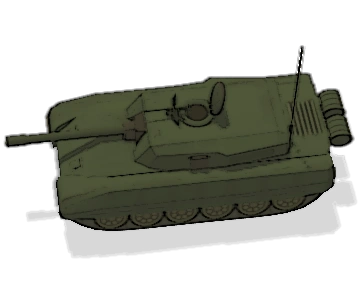
|
Tank | RWR1a1* | Main Battle Tank equipped with a cannon and a mounted MG.
Generally the weakest of the 3 MBTs (lowest damage and health). Total 3 seats - 1 driver, 1 cannoneer and 1 MG gunner |
1 Cannon:
1 MG: 500 RPM. |
13 | 15 | 1200 | Greenbelts |
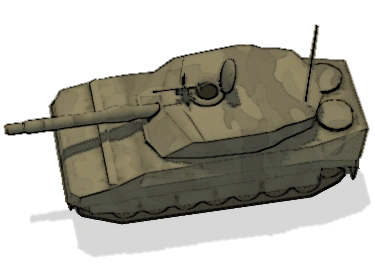
|
Tank | Leopold II* | Main Battle Tank equipped with a cannon and mounted MG.
Generally the most powerful of the 3 MBTs (highest damage, speed and moderate health). Total 3 seats - 1 driver, 1 cannoneer and 1 MG gunner |
1 Cannon:
1 MG: 500 RPM |
14 | 15 | 1260 | Greycollars |
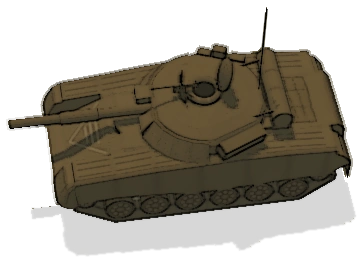
|
Tank | TroX-80* | Main Battle Tank equipped with a cannon and mounted MG.
The most well-rounded of the 3 MBTs (moderate damage, largest blast radius and highest health). Total 3 seats - 1 driver, 1 cannoneer and 1 MG gunner |
1 Cannon:
1 MG: 500 RPM. |
12 | 15 | 1350 | Brownpants |
*Armored: weapons that deal less than 17 explosive damage will not harm.
| Image | Class | Name | Description |
|---|---|---|---|
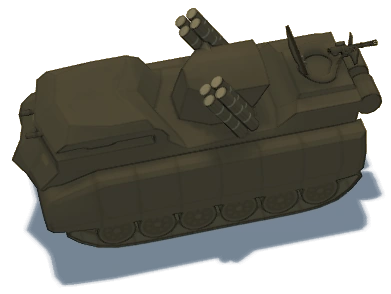 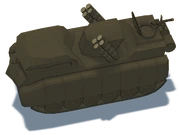 |
Supertank | Darkcat Tank | This heavily-armed special tank can only be found in the campaign during Final Mission 2 or may randomly spawn in Invasion Maps. |
</noinclude>
Line of Sight, Vision[ | ]
See also: Stealth In Running with Rifles, the field of view is different than in most other top-down shooters, as moving the cross-hair towards the edges of your screen increases your view distance in that direction by around 80% (for a default weapon without scope). On the other hand, you will have a sight disadvantage if someone attacks you from the opposite direction. The use of that sight advantage should be kept in mind as it gives you a noticeable advantage over the AI. This is even more important in PvP as the enemy player can also use extended cross-hair moving for early detection. It is not seldom that the player who detects the enemy first will be the winner of the duel.
Also in RWR you don't have a Fog of War so that you can see every enemy that is seen from your point of view, no matter if there is an object between you and the enemy. For the AI it is different, it behaves like it would have a line of sight occlusion, which means that if there is an object between you and the enemy, he won't be able to detect you.
Sight range modifier[ | ]
Depending on the weapon you are using, your extended view might have different values, which makes you see farther if you you use a sniper rifle compared to a conventional weapon without scope.
Here is a comparison between an AK47 (left image) and a SVD with scope (right image) taken from the same location. the AI also takes advantage of sight range modifier
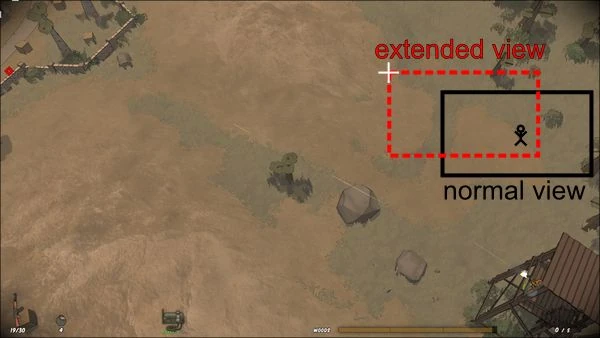 ||
|| 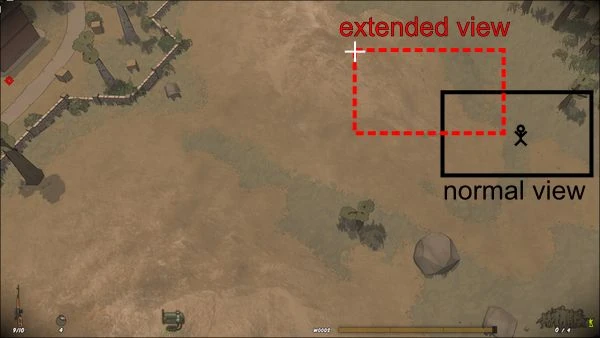
Detection range[ | ]
In RWR, your stance has an impact on your visibility. If you are in the line of sight of an enemy, you will be harder to detect if you crouch or even harder if you go prone. Going prone and crouching affects not only detection range but also reaction time of enemy. Going prone has better concealment than crouch has. Distance between your soldier and enemy also affects reaction time of AI enemy. Shooting causes immediate detection against you if you are in dectection range of enemy.
Other factors are the day and night cycle as the overall visibility of the AI is reduced at night. Also, depending if a sector is alerted or not, the AI will have a different detection range. An alert happens when hostiles have been detected in a close distance either by sight or audibly.
Those factors are especially important, when you want to go stealth. A prone soldier with a silencer weapon, at night in a non-alerted location will be the hardest to detect.
Spotting[ | ]
Mousing over enemy vehicles and structures will mark them on the map for your faction. AI can only spot enemy-occupied vehicles, and only once conditions are met for detection. Spotting gives an instant XP and RP reward to a single player. Only human players can make use of this map information.
Mapview[ | ]

|
will bring you to the map screen. Note that being in the map screen does not stop the action. |

|
Scrolling with the mouse wheel will zoom the map to your liking. |
The mapview can be called by pressing the TAB key (default value). It gives you important informations about what territory is under your control and what base your commander AI is targeting.
It also shows the different accessible spawn, vehicles and resources locations. It also shows the base names and those base are painted in the color of the faction which is under their control.
On the right hand side you have the name of the map (in this case Moorland Trenches) and on top of it a mini map of the worldview, which contains all maps for the campaign and a network which connected them together as you can't move from one map to another if those aren't linked together in the network. With WheelUP, WheelDOWN of your mouse, you can zoom in and out. With the Left Mouse Button keep pressed you can also pan through the mapview (if zoomed in).
Since version 0.96 the soldier repartition is represented by colored clouds. The darker those clouds the more soldiers are on the same location. Enemy clouds can only be seen in sectors in contact with your own one. Squads of your own faction can be seen over the whole map (the picture below is still from the old system where you saw small numbers in each populated square of the grid).
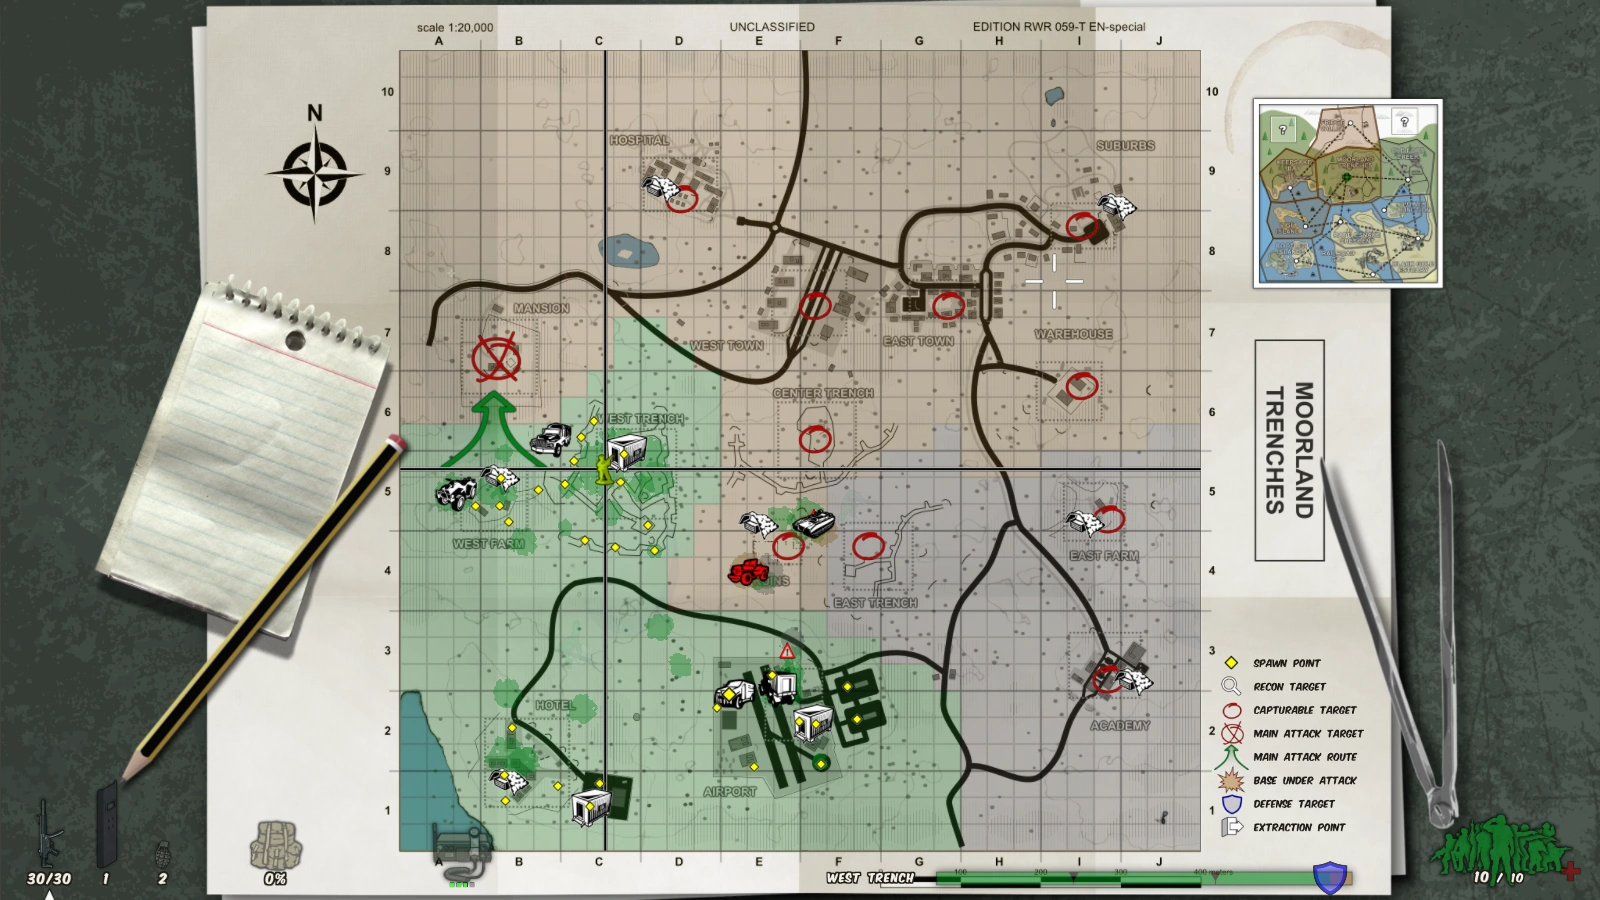
- Action Markers
 |
Attack Target: This is the main attack objective from the Commander AI. |
 |
Attack Start: This is where attacking forces gather up before launching the assault. |
 |
Alert: Hostiles has been sighted inside the capture zone. |
 |
Defense Target: Defense objective from the Commander AI after capturing main objectives and in KOTH maps. |
 |
Battle Alert: Hostiles has been sighted. |
 |
Secondary Target: This is a capturable base that isn't the main objective. |
 |
Player Marker: This is you. In multiplayer, it is a randomized color. |
 |
Spawn Point: click to spawn there instead of pressing SPACE to spawn automatically. |
 |
Exit Point: Extraction point in campaign to move between maps. |
 |
Final Map: Extraction point in campaign for the two final missions. |
 |
Recon Target: Spotting the base will give you RP and XP. |
- Communication Markers
 |
Mortar strike, one salvo |
 |
Cluster Bombing |
 |
Artillery strike, two salvos |
 |
Artillery strike, five salvos |
 |
Gunship run |
 |
Airdrop, cover deploy or supply quad |
 |
Airdrop vehicle |
 |
Four paratroopers |
 |
Eight paratroopers |
 |
Four elite paratroopers, including a super medic |
 |
GPS marker |
 |
Teddy bear marker, only available in Teddy Hunt gamemode |
- Vehicles
Vehicles are shown in red color when those are enemy vehicles that has been spotted. If not spotted, an hostile vehicle will be invisible on the map. After a while a spotted enemy vehicle will become invisible again until it is spotted again. Allies Armored Truck has a spawnpoint attached to the vehicle. So does the Patrol ship and the Flare. If either of those are not near enemy units, you can use them as spawn location by clicking the vehicle. The Armory Truck is similar to the static armory, just mobile and destructible.
 Jeep
|
 Buggy
|
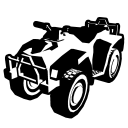 Quad
|
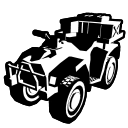 Supply Quad |
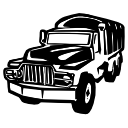 Transport Truck |
 Gun Truck |
 Armored Truck |
 APC
|
 Humvee
|
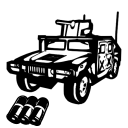 Humvee GL |
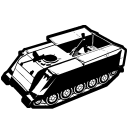 Mortar Tank |
 FST ACAV |
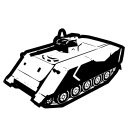 Vulcan Tank |
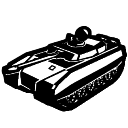 Tank
|
 Cargo Truck |
 Armory Truck |
 AAV-G17/A1 |
 Mustela
|
 Racecar
|
 Rubber Boat |
 Patrol Ship |
 Flare
|
 Darkcat
|
 ACAV
|
 ZJX
|
 Sev-90
|
 FT Croc
|
 Legion
|
 Noxe Ghost |
 M528
|
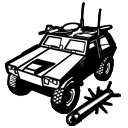 VFS
|
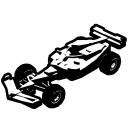 F1 |
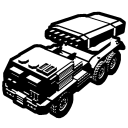 LAI-109 |
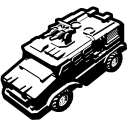 LAILV-002 |
 MMLS-528 |
- Radars
Radars are present on some maps and are side mission objectives. They are usually well defended so it's hard to sabotage them, especially the Radar Tower but gives along with a nice RP reward, also a communication slow-down of the enemy, i.e. the mapview markers of the enemy team will become invisible and the commander AI won't start organized assaults anymore until the radar respawns (usually 300 seconds). Also it jams radio communication so that you won't be able to use radio calls in a large perimeter around a radar tower/truck. There is also a radio jamming tower ingame, which is similar to the radar tower but with the difference that it won't affect the commander AI slowdown.
 Radar Truck |
 Radar Tank |
 Radar Tower |
- Resources
The stash is always visible on the map, even if it's in hostile territory.
The armory is only visible in your own territory but you can use enemy armories as well. They will only sell you resources that available for your faction.
 Armory
|
 Stash
|
- Stationary Weapons and Deployables
 TOW
|
 Minigun
|
 Mounted MG |
 Mounted GL |
 Mortar
|
 Hornet
|
 Repair Crane |
 Missile Launcher |
Note: The missile launcher is a stationary which cannot be deployed and is exclusive to Swan River.
- Mission Objective "vehicles"
Anti-Air Emplacements prevent air-dropped support calls in the area. Destruction gives an instant XP and RP reward to a single player.
Prison Doors, Prison Hatches and Prison Buses will grant a one-time influx of veteran soldiers upon their destruction.
 Prison
|
 Anti-air
|
Ranks, experience and Scoring[ | ]
Ranks and experience[ | ]
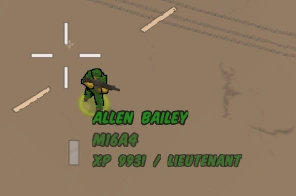
Similar to most RPG, you gain experience while killing enemies. The higher the rank of the enemy, the more XP you gain.
Performing kill combos will also give you an XP boost. Stabbing an enemy gives the most XP, as the XP multiplier is around 250%.
To view your XP/rank, hover over your character. The number at the bottom shows your experience points (XP) and it starts from 0 at the beginning. On the right side is shown your current rank. You gain XP by killing enemies (the XP gain pops up over an enemies dead body). You also lose some XP by getting killed/committing suicide or team killing. You can also check your rank by keeping the F key (by default) pressed and right beyond your soldier your XP and RP is shown.
Your rank will dictate a few things:
- Capacity of equipment such as grenades, cover elements, medikits, etc.
- Ability to use certain weapons/equipment that are rank-restricted.
- Ability to use radio calls
- Number of maximum squadmates possible (one per 1000 XP, up to a maximum of 10).
- Ability to take command of vehicles from other squads. When your rank is greater than the rank of a soldier driving a vehicle, you can force the soldier to disembark by getting in the driver's side.
The XP requirements for each rank can be referred in the table below:
| XP | Rank | Radio calls | Weapons | Equipment | Throwables |
|---|---|---|---|---|---|
| 0 |  Private |
Assault rifles Shotguns |
Riot shield | 2 hand/stun grenades | |
| 500 |  Private 1st Class |
Rocket launchers Silent pistols |
Deployable cover |
2 impact grenades | |
| 1000 |  Corporal |
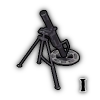 Mortar strike (1x8) Sandbag drop |
Machineguns Desert Eagle pistol |
Vest Type II | 1 C4 |
| 1500 | Sniper rifles Advanced assault rifles (with unlock) Silent SMGs L85a2 (with unlock) Pepperdust shotgun (rare) |
1 Claymore mine | |||
| 2000 |  Sergeant |
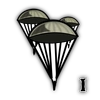 4 paratroops |
Second rocket launcher |
Deployable machine-gun Deployable minigun Deployable mortar Deployable Hornet |
3 hand/stun/impact grenades 2 C4 bombs |
| 3000 |  Staff Sergeant |
 Cluster bombing 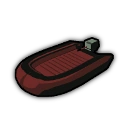 Boat drop 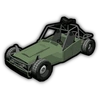 Buggy drop |
AA-12 shotgun (rare) XM-8 assault rifle (rare) F2000 rifle (rare) P90 submachinegun (rare) |
3 C4 bombs 2 Claymore mines | |
| 4000 |  Staff Sergeant 1st Class |
 Artillery strike (2x16) 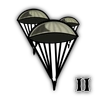 8 Paratroops 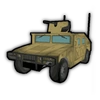 Humvee airdrop |
Benelli M4 shotgun (rare) VSS Vintorez sniper rifle (rare) Neostead 2000 shotgun (rare) XM-25 Launcher (rare) Barrett M-107 sniper rifle (rare) |
4 hand/stun/impact grenades 1 paratroop flare 1 checkpoint flare | |
| 5000 | 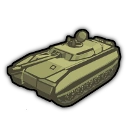 Tank airdrop 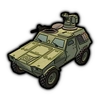 VFS airdrop (exclusive to Veterans Pack owners, see Radio calls) |
Deployable TOW missile nest | |||
| 6000 |  2nd Lieutenant |
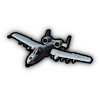 A-10 gun run |
2 paratroop flares 3 Claymore mines 2 checkpoint flares | ||
| 7000 |  Artillery strike (5x16) |
||||
| 8000 |  Lieutenant |
||||
| 10,000 |  Captain |
 Gunship run |
2nd deployable TOW missile nest | ||
| 12,000 |  Major |
||||
| 14,000 |  Lieutenant Colonel |
||||
| 20,000 |  Colonel |
||||
| 50,000 |  Brigadier General |
||||
| 100,000 |  Major General |
||||
| 200,000 |  Lieutenant General |
||||
| 500,000 |  General |
||||
| 1,000,000 |  General of the Army |
Player model has a better outfit. | |||
| 2,000,000 |  General of the Army (II) |
Player model has a sweet outfit. | |||
| 3,000,000 |  General of the Army (III) |
||||
| 4,000,000 |  General of the Army (IV) |
Player model has a nicer outfit. | |||
| 5,000,000 |  General of the Army (V) |
Player model has an even sweeter outfit. | |||
| 6,000,000 |  Field Marshal |
Player model has a fancy outfit. | |||
| 8,000,000 |  Vice President |
Player model has a decently fancier outfit. | |||
| 10,000,000 |  President (bald) |
Player model has the fanciest outfit. |
Scoring[ | ]
Score is a statistic for online play. It is a simple Kills – Deaths calculation and gives you a general idea of performance. If a server has Persistent Statistics, then your score along with the other stats shown by pressing the F1-key (default) will be saved over multiple matches and logins. None of these statistics have any influence on gameplay.
Resource points[ | ]
RP or "Resource Points" are points you receive during the game while completing different tasks. Those RP can be used to buy different equipments at an armory or to use different radio calls. You can see how much RP you have by keeping the inventory key (Default "F") pressed to call the inventory. It is displayed right below the XP information.
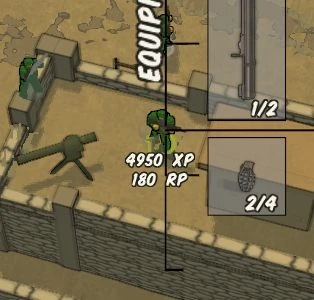
List of things that give you RP:
- capturing a base
- spotting an enemy vehicle
- selling valuables at an armory. Those are dropped with different commonness from the enemy soldiers and have also different values
- selling rare weapons (those can either be used or sold). Those are either dropped by mini-bosses or found in special crates (metallic boxes)
- destroying enemy vehicles.
- destroying mission targets such as comms truck, radar tower, prisoner bus, radio jamming tower, water tower, fuel tanks, mortars, ammunition crates, AA emplacement results in a good RP reward
- Stealing the Cargo Truck of the enemy team and bringing it back to one of your armories
- being promoted to a higher military rank
Squad control[ | ]
When your character is of sufficient rank, squadmates will begin to follow you around. Soldiers of lower rank will automatically join your squad.
Members of your squad will have small grey indicators under their feet and will stay within a certain distance of you. By default they will follow you, but clicking the right mouse button (RMB) will order them to specific places. By double clicking RMB you can order squadmates to charge a position without taking cover.
A higher ranked officer nearby may "steal" soldiers from your squad to fill out his own squad. The size of your squad is determined by your XP: you can have one squadmate for every thousand XP, up to ten. Squad size does not correlate with rank.
Controls[ | ]
-
Squad Move Command (double tap for charge*)
Increase Squad Capacity
Decrease Squad Capacity
Next Squad Layout
Previous Squad Layout


.png)
Vehicles[ | ]
Squad members will attempt to enter any vehicle that you enter and will fill as many seats as possible. If, however, you are in the passenger seat of a vehicle and your squadmate is in the driver's seat, you can click RMB to command the driver to drive around the screen.
You can also open up the Map and click RMB on the Map to set waypoints further away. The driver AI will drive there, terribly, often running over other friendly troops.
Pressing PageDown will decrease your squad size. This can be useful when you want to sneak into an enemy base without being spotted, or if you just want to be a lone wolf. Pressing the PageUp key will increase the squad size to the max size a soldier of your rank can support.
Splitting the squad[ | ]
Being the squad leader you can also split the squad into a vehicle sub-squad (which handles the vehicle and the mounted weapons) and a foot squad which will provide infantry support.
You need a modification key (MOD) bound to use these commands. The default is Windows key.
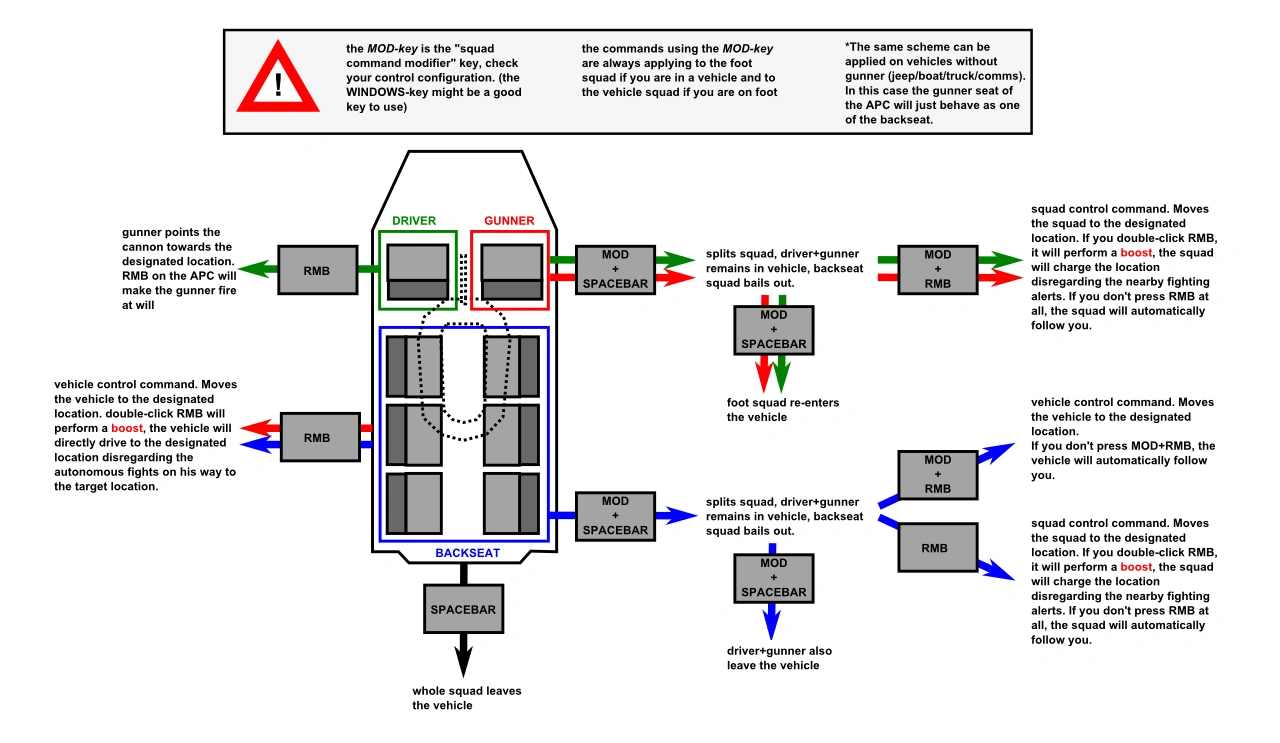
Example[ | ]
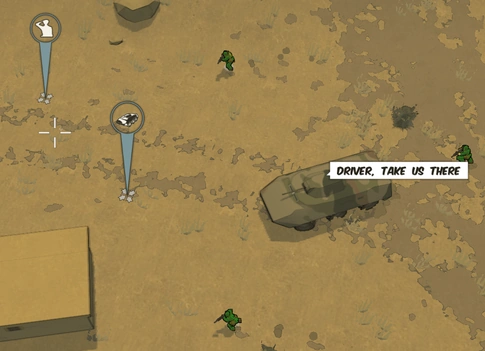 |
In this example, the player hopped into the APC as gunner. All the squad members jumped into the vehicle as well. The driver seat has the highest priority, then gunner slots, then passengers.
The player first pressed "Windows+spacebar" to make the other sub-squad bail out, which in this case are the backseat soldiers. Then, they clicked the "right mouse button" on the location where the APC Marker is, which will make the driver move the APC to that marker. Lastly, they clicked "Windows+Right mouse button" at the location where the Squad marker is, and the sub-squad on foot outside the APC will move there. |
Squad layout[ | ]
The squad layout represents the kind of soldiers you want in your squad. For example, the "Default Squad" layout will try to pick up first a soldier with a medikit on him and the other squad members are chosen randomly. For detailed information on how to edit config files to make your own kinds of squad, click through to the full article.
Combos and Badges[ | ]
- Combos are shown when you achieve to kill at least 3 soldiers with max 2 seconds between each kill. The more soldiers you eliminate within that logic, the higher the combo, thus the bonus XP award you receive on top of the XP for killing each soldier individually.
- Badges are visual overlay images that show you that you did something special, like a kill streak, dying 5 times in a row without killing anyone, teamkilling at least 2 allies with one explosion, dogtag for killing an enemy soldier, etc.
Valuables[ | ]
Valuables are items that soldiers drop randomly on death. Valuables can be sold at the Armory. The most important valuables are the Laptop and Briefcase, after being sold to the Armory it will unlock a weapon, much like delivering an enemy Cargo Truck to the Armory. Percent drop chance is rounded to the nearest hundredth of a percent, and only is applicable for invasion.
Click to the full article to see a complete list of valuables and their values.